Do you want to know the push notification hacks to double your engagements? We will show you the proven hacks of push notifications that can double your engagements in a very short period. The best part is that it works in every industry.

One of the best ways to reduce cost and increase conversions is customer engagement. Push Notification is the best tool for customer engagement. It allows you to re-engage customers in the most effective way that leads to higher conversion and engagement. Push notifications are super cost-effective. So, you can easily scale your engagement campaigns.
The best thing about using push notifications for engagement is the ease of use. You can install push notifications in less than 10 minutes. Most of the features are can be enabled with just 1 click. Moreover, you can easily integrate push notifications on different platforms.
However, to get the maximum out of push notifications, you need to use them the right way. In this article, we will share the top hacks that can shoot up your revenue and engagement.
9 proven Push Notification hacks to double your engagement
Sending In The Subscriber Time Zone
To understand this, let’s take two scenarios:
You have subscribers from different parts of the world. In the event of New Year, you are running a sale event.
Scenario 1
You sent out a push notification to all your subscribers. The notification gets delivered instantly. However, many of your subscribers are in different time zone. The notification will be delivered to your subscriber based on your time zone. Will every subscriber receive the notification when they are active?
Scenario 2
To ensure push notification is delivered according to the local time of the subscriber, you have created multiple push notifications. These will be delivered at different times based on the geo-targeting. Is creating multiple copies of the same notification an ideal solution?
In both the above scenarios, your engagement rate will be low. The reason is that the notifications will not be delivered when the subscriber is active. The solution to this is the Subscriber Time Zone.
Subscriber Time Zone allows you to send the same notification to be delivered to a subscriber based on their local time zone. You do not need to create multiple copies. Based on each geo, the same notification will be delivered. This small hack will surely increase the engagement rate for your push notification campaigns.
How to send notifications in the subscriber time zone?
It’s a very simple process. The option is available when sending push notifications. You have to just tick the checkbox for subscriber time zone. The notifications will then be delivered as per the subscriber time zone.
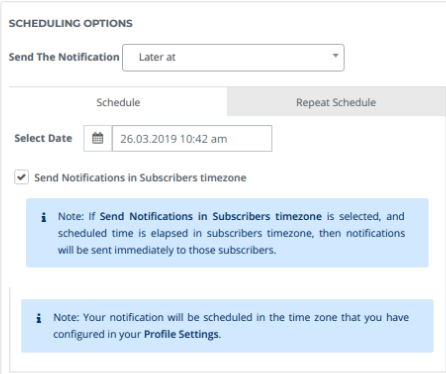
Before sending notifications in the subscriber time zone, make sure to set your time zone settings correctly. For more details, check out the detailed post on sending push notifications in the subscriber time zone.
Using Large Image
We all know that pictures more powerful than words. PushEngage allows you to add a large image in the notification. This allows you to deliver the message visually.
A large image allows you to stand out among other notifications. Vegis, an eCommerce site, shared that – As compared to the regular notification, large image notification resulted in a 37% increase in CTR for Vegis.
So start using large images in push notifications to increase engagement.
How to use large images in push notifications?
When you create push notifications, you have the option to upload a large image. By default, it’s in off mode. You have to slide the button to on.
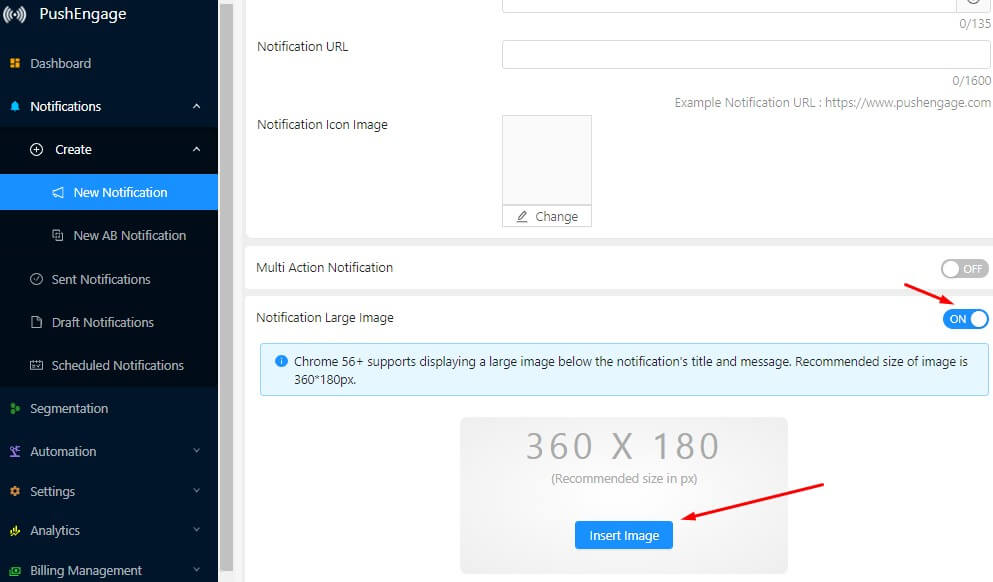
Create an image of the size of 360×180 pixels. Click on ‘Insert Image’ to upload the image.
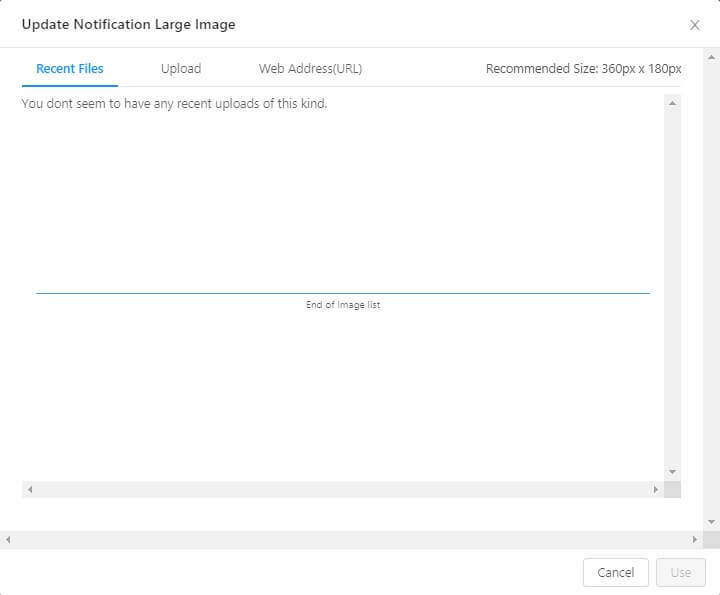
You have multiple options to upload an image. PushEngage also has an image library feature. It allows you to use the previously used image in the notification.
Once the image is selected, click on use. It will now appear in your notification. Start using a large image to see the impact on the performance of push notifications.
A/B Testing
You may not know whether the web push notification you are sending will be effective or not. You may go with a hunch that the push notification will work. The best way to confirm is to run AB testing on push notifications.
It allows you to test different parameters of push notifications. You can select a specific audience to test the notification. Once you know which notification has performed well, you can use that notification and send it to all.
How to do AB testing on push notifications?
At PushEngage, you can easily perform AB testing on push notifications. To do AB testing, go to PushEngage dashboard->Notifications->Create->AB Testing.

There are 7 different parameters you can test in AB testing. For more details, you can follow the article on AB testing in the push notification.
Send Targeted Notifications
What happens if you send irrelevant notifications to subscribers? It will lead to an increase in unsubscribe and decrease the engagement rate.
PushEngage allows you to make segment push subscribers based on different parameters. Segment subscribers based on geo, device, actions, purchase, and many other parameters. You can also use the advanced segmentation option that allows combining multiple segments for better targeting.
How to send notifications to targeted notifications
You can use segments in all the push notification campaigns to send targeted push notifications.
1> Sending single notification
You can select a segment when sending a single push notification. Scroll down on the ‘New Notification’ section; you will see an option ‘Select Audience’. Click on that and you will see the segment option.
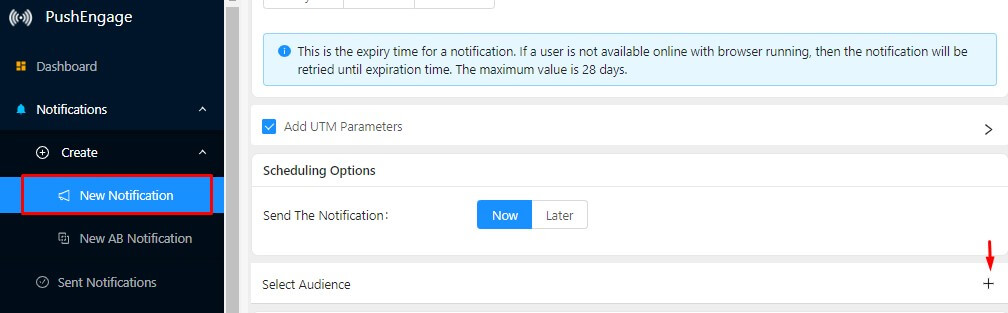
You can then send targeted push notifications to each segment.
2> Select segment in push notification campaign
Take an example of a drip push notification to see how you can select a segment in campaigns. You can follow the same steps for other campaigns (except cart and browse).
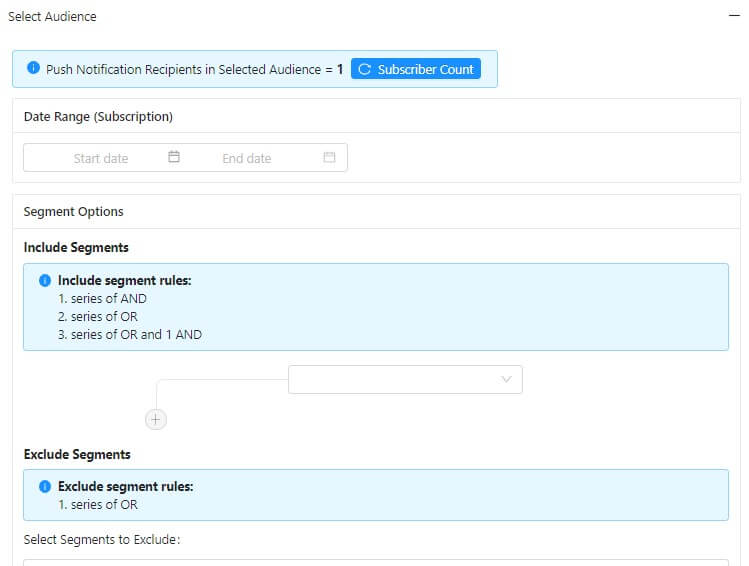
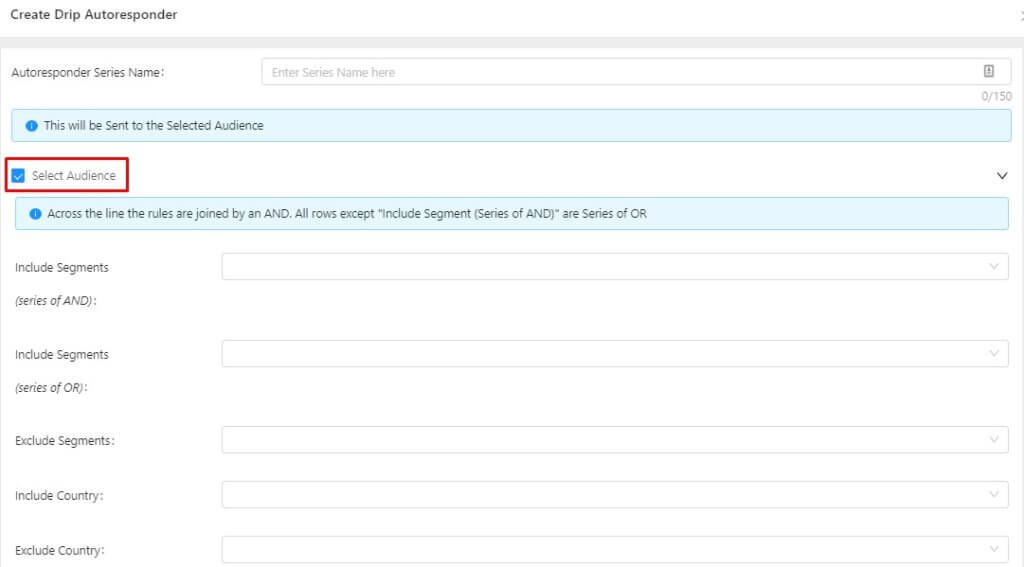
Go to Automation->Drip Campaign. Click on the’ Create Drip Autoresponder’. It will open the drip campaign settings. Check the ‘Select Audience’. It will display different targeting options. Select the segment to which you want to send push notifications.
Start using segmentation when sending push notifications. As per the study, notifications send to segments lead to a 2X increase in click rates as compared to the notifications sent to all.
Cart Abandonment Campaigns
One of the proven push notification hacks to increase engagement and conversion is a cart abandonment campaign. Users usually do not buy in a single visit. You need to re-engage them to convert them to customers.
Using the cart abandonment campaign, you can automate the entire process. It will automatically send push notifications to cart abandonment users.
How to set up cart abandonment campaigns?
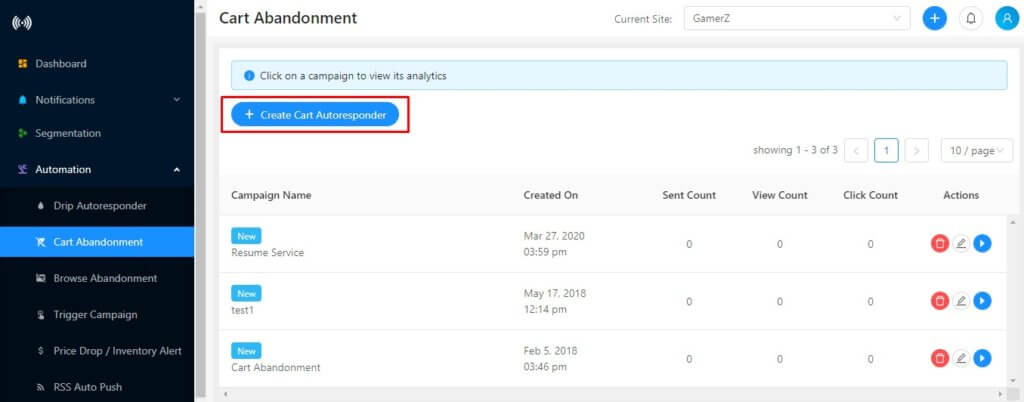
Go to Automation->Cart Abandonment. Click on the ‘Create Cart Autoresponder’. It will open up the cart abandonment settings. Make all the changes and go live with cart abandonment.
Check out the article on steps to set up a cart abandonment campaign. Here are the most converting cart abandonment templates for your campaign.
In the case of Shopify, the cart abandonment setup is different. With a single click, you can activate the campaign. Follow this article on setting up a cart abandonment campaign in Shopify. Install the PushEngage app on Shopify and get started with the cart abandonment campaign.
Drip Campaigns
When any new user subscribes to your push notification, they might not be aware of your brand and product. You need to nurture them and show them the benefits of being engaged with your brand.
Using Drip campaigns, you can automate the entire process. The most common use of the Drip feature is in Onboarding campaigns. Create an Onboarding campaign in Drip. Add a series of push notifications to nurture and educate users about your brand, product, reviews, benefits, and a lot more that will keep to engaged. Whenever any new user subscribes, it will automatically send a push notification.
Using Drip feature you can create multiple campaigns:
- On-boarding campaign: To nurture new users.
- Category Campaign: Based on what the user has purchased, create a series of notifications to showcase the other products under the same category.
- Interest-Based Campaign: Segment subscribers based on their interest. Run different campaigns based on customer interest.
Drip is a very powerful feature that can increase conversions as well. One of the leading blogs, ShoutMeLoud, increased conversion by 10% using Drip.
How to run a Drip Campaign?
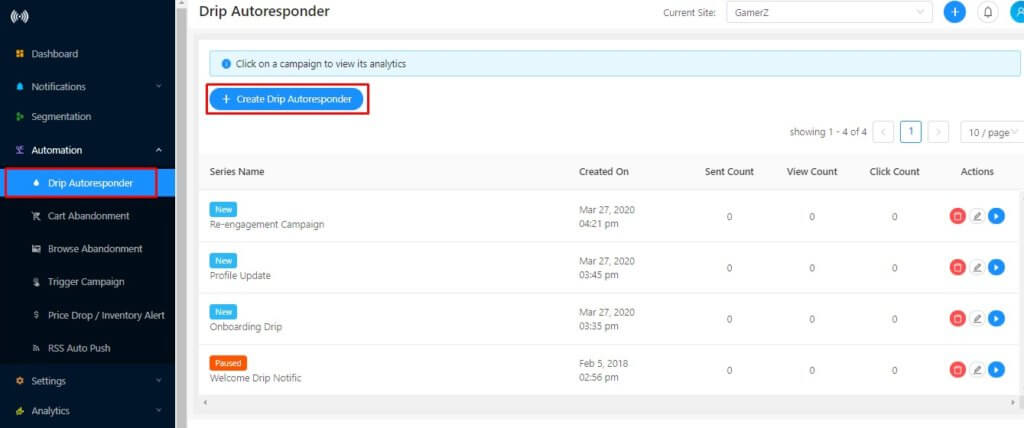
To run a drip campaign, you first need to create segments. Once a segment is created, go to Automation->Drip Autoresponder. Click on Drip Autoresponder
Now select the segment for the drip campaign.

After selecting the audience, you can add a series of notifications to the campaign. The notification will be sent whenever any new subscribers come into that segment.
Check out this article for detailed instructions on setting up a push notification drip campaign. Follow the best practices in a drip campaign for better results.
Geo-based Optin
As a website, you know which geo performing well for your business and which are not. What happens when you have subscribers from non-performing geo? You are just paying for those subscribers who are not going to engage.
Moreover, your overall engagement is also affected. It will not give you a clear picture of the campaigns whether they are performing well or not.
Using PushEngage you can easily exclude those geos. Push Notification optin will not appear on those geos. This will help you get subscribers only performing geo.
How to setup geo-based optin?
Setting up geo-based optin is very simple.
Step 1> Go to PushEngage dashboard->Settings->Subscription Settings->Optin Management.
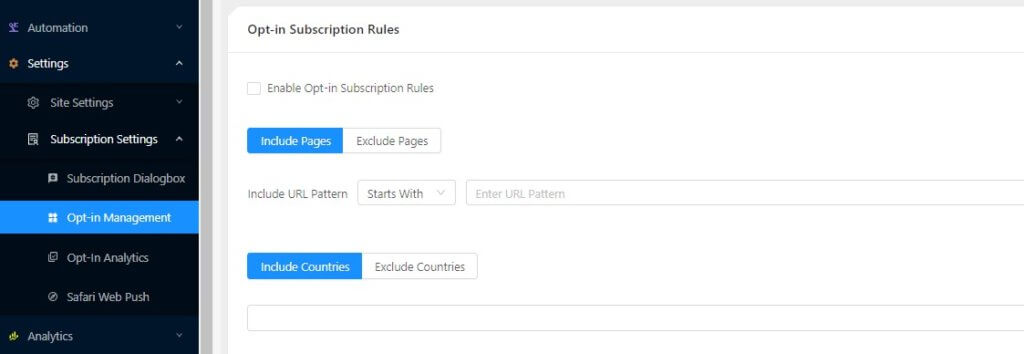
Step 2> Select the check box of ‘Enable Opt-in Subscription Rules’. Now, select the exclude option and add the geo that you want to exclude.
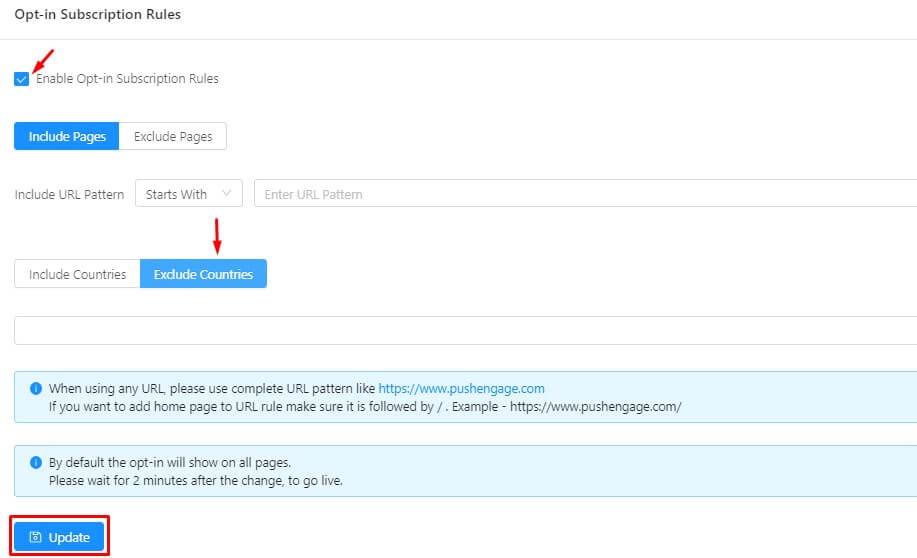
Click on the update button for the changes to reflect.
The optin will not appear on those geos.
Browser Abandonment Campaigns
There are times when people just browse products without taking any action. It’s like window shopping in the online world. It shows that users are interested in the product.
Using PushEngage, you can easily engage such subscribers and convert them to customers. Browse Abandonment Campaign helps you to target such subscribers.
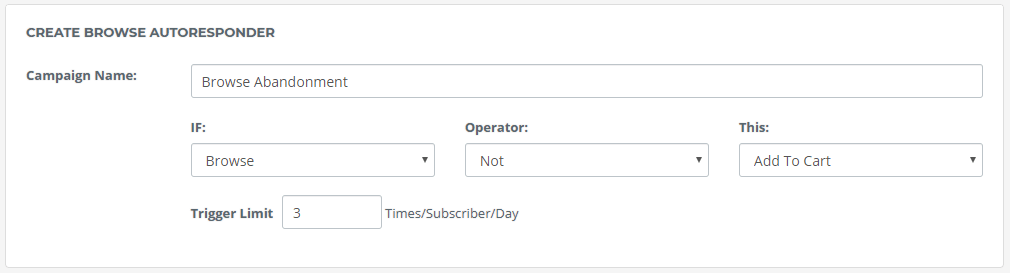
How to set up a browse abandonment campaign?
Go to Automation->Browse Abandonment. Click on the ‘Create Browse Autoresponder’. It will open up the browse abandonment settings. Default settings are in place. You can make the changes in the notification template and go live with the browse abandonment campaign.
For detailed setup, follow this article on the browser abandonment campaign.
Subscribers usually browse many products when they visit a website. Sending browse notification every single time will result in too many notifications for the subscriber. So, use the right strategies to browse abandonment campaigns before going live.
Multi-Language & Emoji Support
Personalization is very important to increase engagement. Any campaign when personalized can increase your engagement rate. Personalization applies to all the above campaigns as well.
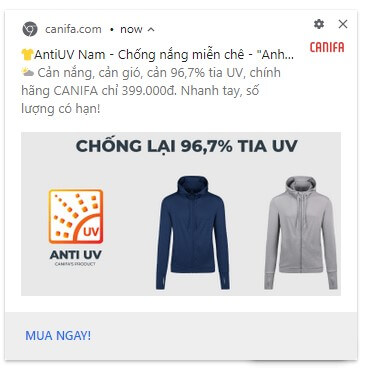
One of the best ways to personalize notification is by using the local language. People get engaged when you talk to them in their language. It feels more personalized. The same can be done with Push Notifications. You can send push notifications in the local language as well.
PushEngage supports all the languages that can be captured using UTF 8 characters. You just have to type in the local language to see it work. See the below notification sent in the local language.
Another way of personalizing notifications is by using emojis. Using PushEngage, you can easily add emojis to your notification. Whenever creating a notification, select the emoji icon.
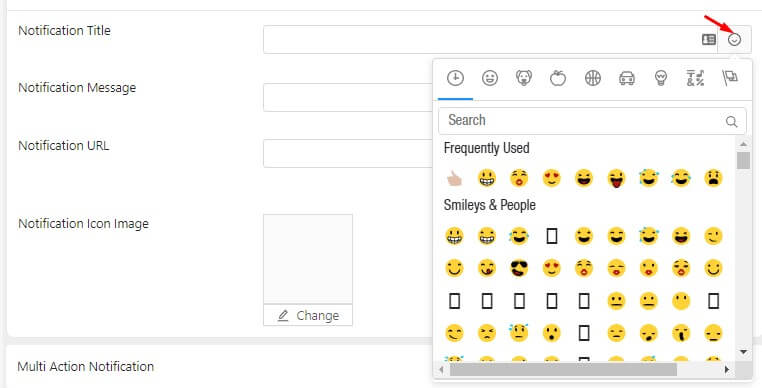
It will display all the emoji options. You can add emojis in the notification title and description. The option is available in all the campaigns like cart abandonment, browse abandonment, drip. Now you know the proven Push Notification hacks to double your engagement. This works in every industry. An increase in engagement will lead to an increase in conversions as well. If you need any help in implementing the above, reach out to care@pushengage.com.


