You have configured Web Push Notification on your website. A subscription box for Push Notification is live as well. Visitors coming to your website are subscribing to your push notification by clicking on “Allow”.

Once they click Allow, they are subscribed to your push notification. However, there are a lot of people who clicked on “Deny” or “Block”. So what happens to this set of visitors? Will they receive your Push Notification?
The answer is No; they will not receive your push notification. And they will not see the push subscription opt-in as well. Since they have clicked “Block”, they will not see the subscription box next time they visit your website.
People may have clicked “Block” earlier, but now they want to subscribe to your push notification service. They want to receive updates about your product, new blog posts, updates about your website. However, they cannot do so, since the opt-in will not appear on their browser.
However, with PushEngage, you can now allow such visitors to subscribe to your Push Notification service. One of the ways to optimize push subscription rates is to use “Get Notification Widget”.
What is Get Notification Widget?
Get Notification Widget allows the user to get the Subscription Opt-In re-appear on their browser. This will allow them to subscribe to your Web Push Notification. When a user clicks on “Deny”, the push subscription doesn’t appear when the user re-visits your website. To allow the user to subscribe to your Push Notification, Enable “Get Notification Widget”.
How Get Notification Widget Works?
You have enabled the Get Notification Widget from your account. Now when a visitor comes to your website and clicks on “Deny” or “No“, Get Notification Widget gets Activated. See the below steps for more clarity:
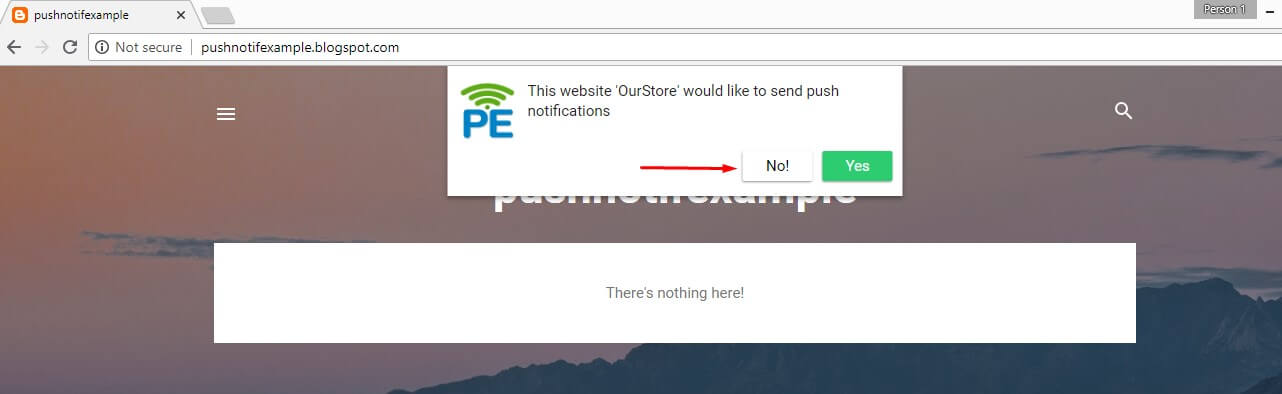
- In the below screenshot, the push notification opt-in appeared, and the user clicked on “No”.
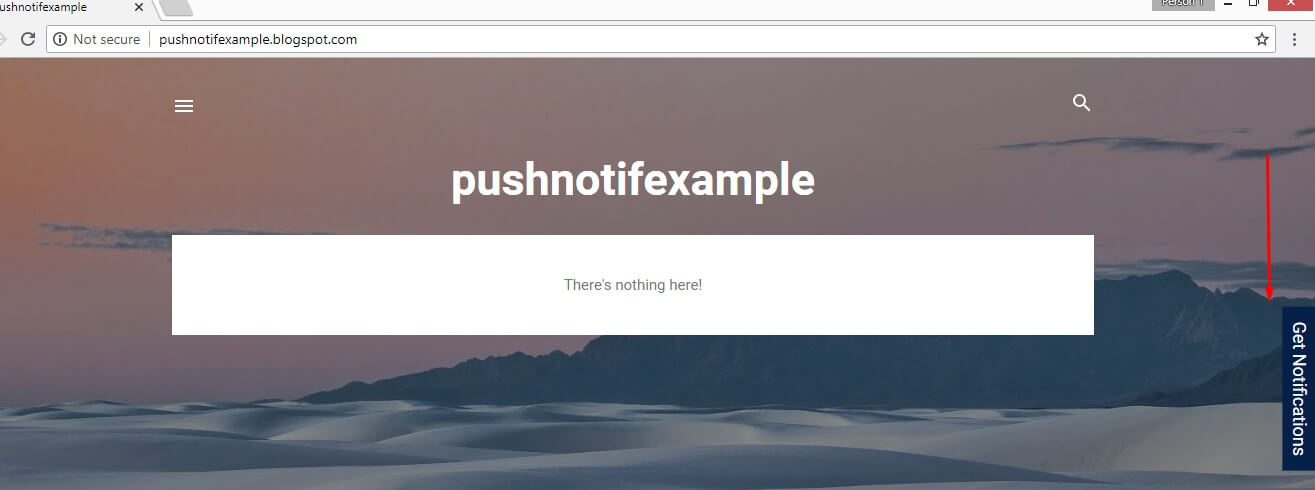
- On Clicking Now, Get Notification Widget gets activated. It will appear on the website.
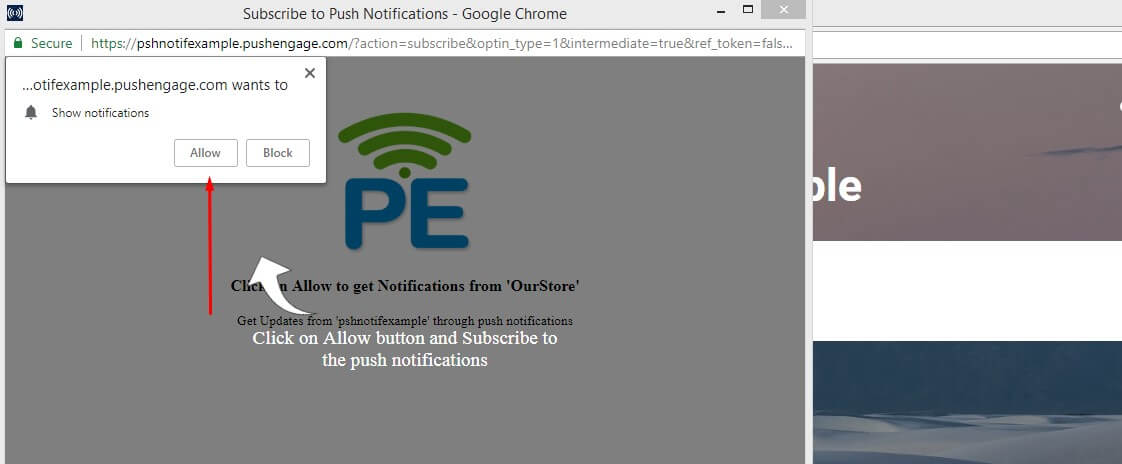
- Click On Get Notification Widget and it will show the Subscription Opt-In. The user can now click on “Allow” to get subscribed to Push Notification.
How to Enable Get Notification Widget?
To enable Get Notification Widget, follow the below steps:
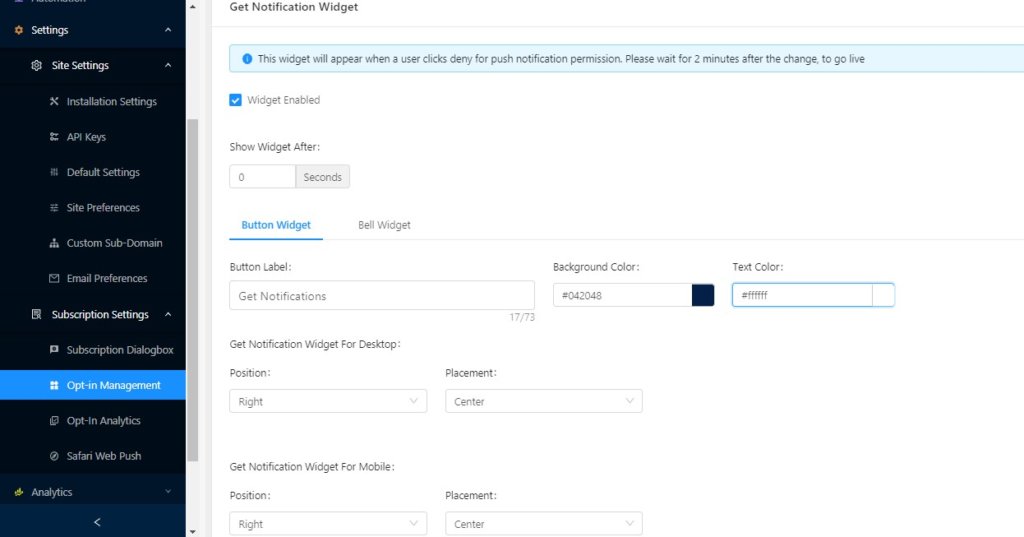
From PushEngage Dashboard, go to Settings –> Subscription Settings –>Opt-in Management. You will see the “Get Notification Widget“. Check the button to Enable.
How to Configure Get Notification Widget?
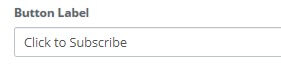
Change the text: You can change the text of the widget. Instead of “Get Notifications”, you can write “Click to Subscribe”

Different Background Color & Text Color: You can also change the background color of the Widget to suit your color palate. You can even change the text color. The default is Blue Background and White text color. You can change it any other combination like a Black background and Red Color Text.

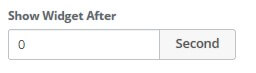
Adding Delay: You can add the delay to the Notification Widget. So if you add a delay of 10 seconds, the Notification Widget will appear after 10 seconds of the user clicking “Block” or “No”.
Display Settings: There are two display settings for “Get Notification Widget”.
- Position: On which side of your browser, you want to show the widget: Left, Right or Bottom
- Placement: Where you want to place your widget: Center, Top or Bottom.
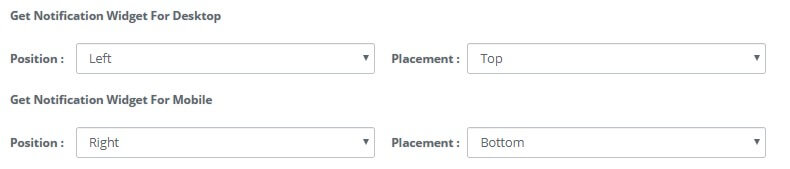
You can set the Display settings separately for Desktop & Mobile.
Below are the different combination of the settings and how it will appear:
In desktop:
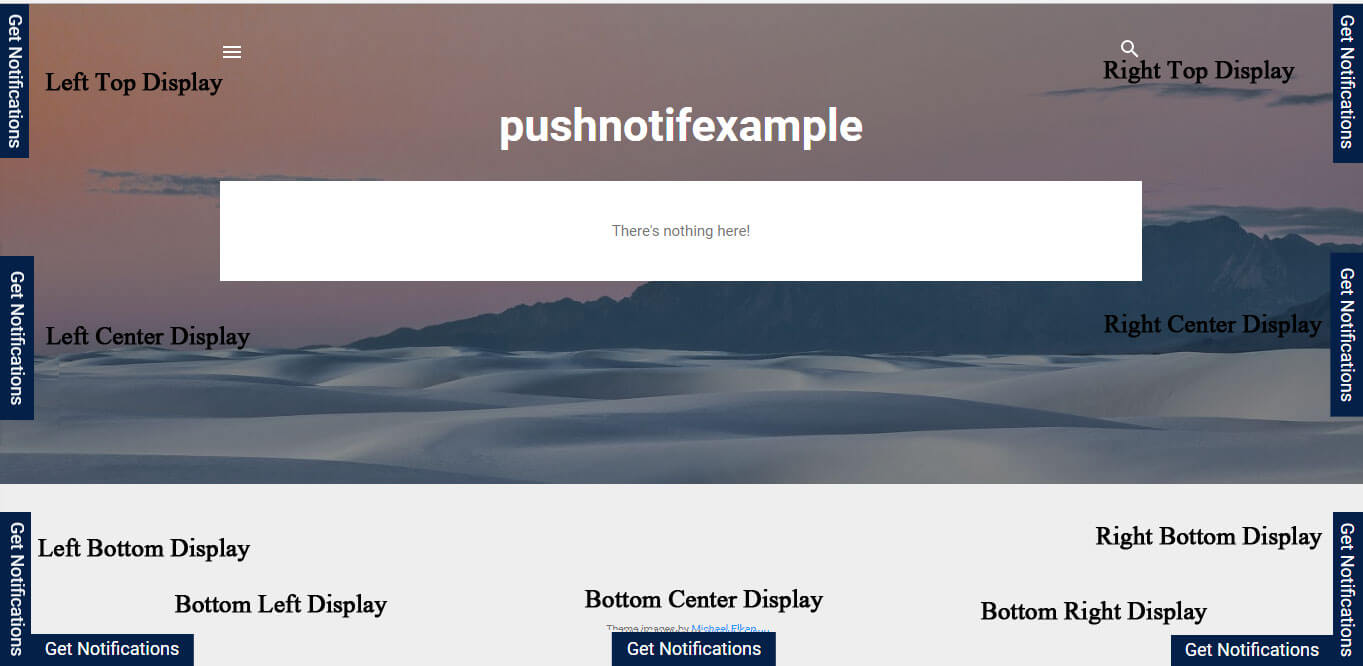
In Mobile:
Start using Get Notification Widget and give your visitor the chance to subscribe to your Push Notification.

Before signing up with any vendor always check for the different features of the service provider and also reviews in top review sites. You can always ask for the trial and once you are satisfied then you can go for the paid plan. Ensure, the service provider always migrating your push subscribers from other vendors.


Good job