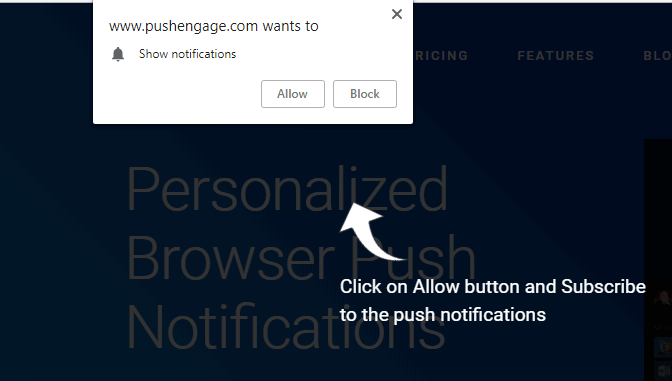
Looking for a great way to style your push notification opt-ins?
Push notifications are a great tool to increase your repeat traffic, engagement, and sales. So, you’ll want to increase your opt-in rates as much as possible.
In this article, we’ll show you how you can style your push notification optins for both mobile and desktop.
Let’s dive in.
Types of Push Notification Optins
There are two basic types of push notification optin:
- Single Step Optin: Users can subscribe to push notification in a single click. It doesn’t allow any customization and uses only system default styles.
- Two-Step Optin: For two-step optins, the user has to click twice to subscribe. but the upside is that you can customize everything from design to copy.
But you should know that there’s a bunch of different optin subcategories.
Mainly, we’ll see a bunch of variants in two-step optins as single-step optins aren’t really customizable.
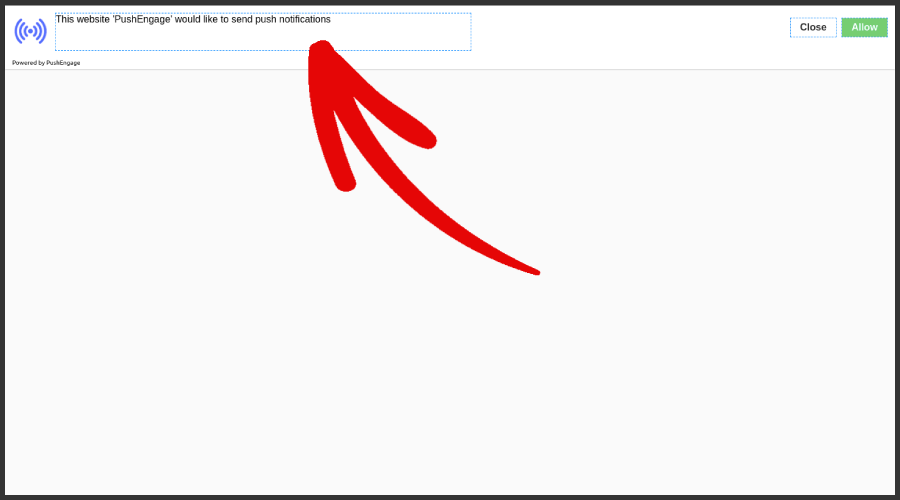
You can choose to use a Safari-style optin:

A Large Safari Style Box optin:
A Bell-placed bar optin:
A Large Safari Box with Segments:

A Floating Bar optin:
Or the simple Single Step optin:

If you’re not sure which one you should go for, keep reading. We’ll talk about some of the customizable features for each optin type later in this article.
The cool part is…
You can customize whatever push notification optin you choose for your site directly from your PushEngage dashboard.
And if you’re feeling fancy, you can even change the placement of the optin popup. Everything about the optin is completely customizable including the color of the text or background both for desktop and mobile.
Another important element in subscription optin is the Notification Overlay.
An overlay gives you additional space to explain the benefits of subscribing to your push notifications. For a single-step optin, your Notification Overlay becomes very crucial because you can’t edit the optin copy.
How to Style Your Push Notification Optin
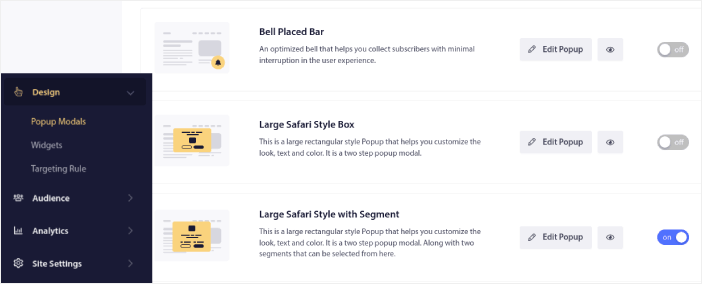
In your PushEngage dashboard, head over to Design » Popup Modals and select a type of subscription optin to customize:
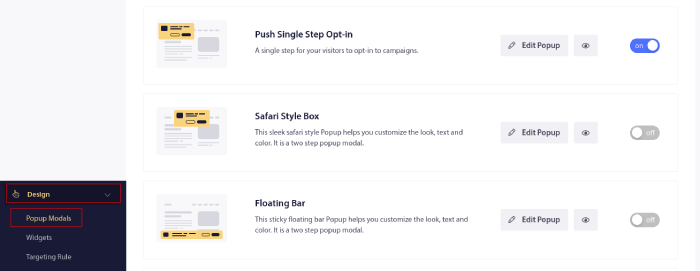
The coolest part is that you can use multiple push notification popup modals at the same time.
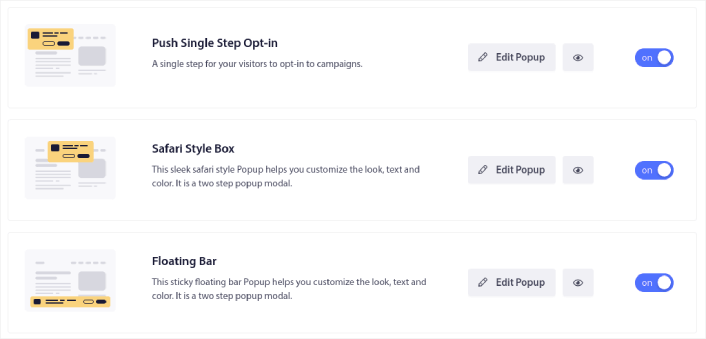
Now, you can run multiple optins and test which one works better for your site without having to switch between them.
We’re going to talk about what’s different in each optin when we get styling each push notification optin. If you’re completely new to push notification optins, we recommend reading the entire article and deciding what kind of optin is right for your site.
But if you’re already familiar with different types of push notification optins, you should jump to the kind of optin that you want to style:
- How to Customize a Safari Style Push Notification Optin
- How to Customize a Large Safari Style Box Opt-in
- How to Customize a Bell Placed Bar
- How to Customize a Large Safari Style With Segments
- How to Customize a Floating Bar Push Notifications Optin
- How to Customize a Single Step Push Notification Optin
Let’s take a look at each type of optin and how you can customize them.
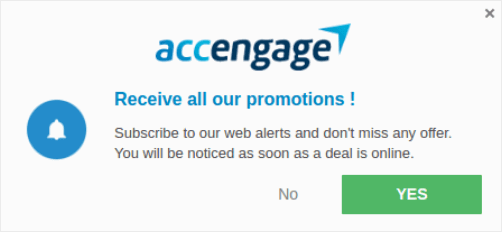
How to Customize a Safari Style Push Notification Opt-in
Let’s start things off with customizing your Safari-style push notification opt-ins for desktops. A Safari-style optin is a popup that looks like a standard Safari popup. Only, if you create a Safari-style push notification optin, your site visitors will see the Safari style no matter what browser they use. And it has nothing to do with the Operating System their device is running on.
So, you’re not restricted to just the Apple ecosystem. The styles simply get carried forward no matter what browser or Operating System your subscribers have.
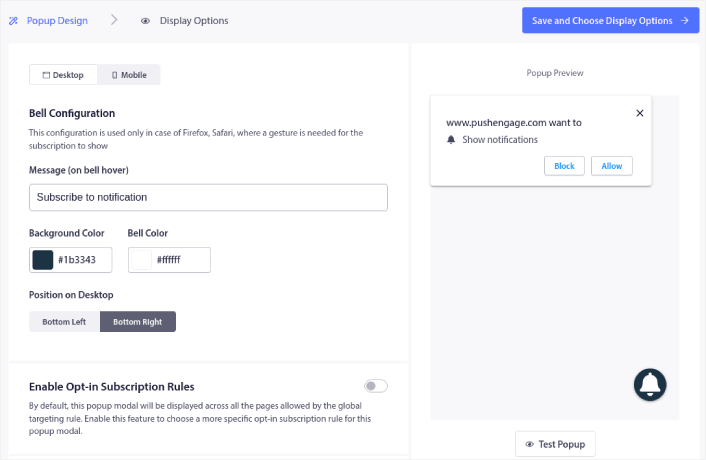
The first feature your should know about is the placement of your optin on the screen. You can decide where you wish to show the optin on your website or the placement of your optin from the options given in the dropdown.
Customizing the Style
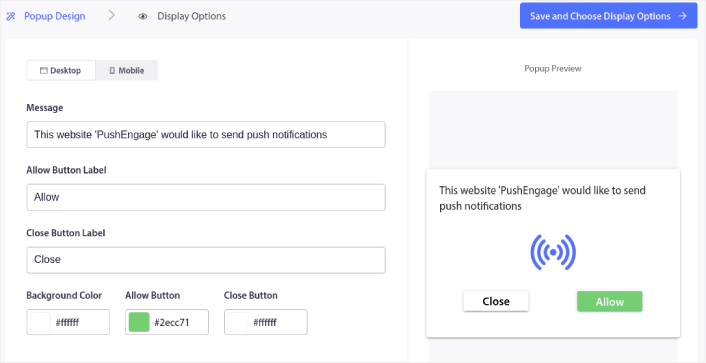
Click on Edit Popup and under the Popup Design tab, design your optin:
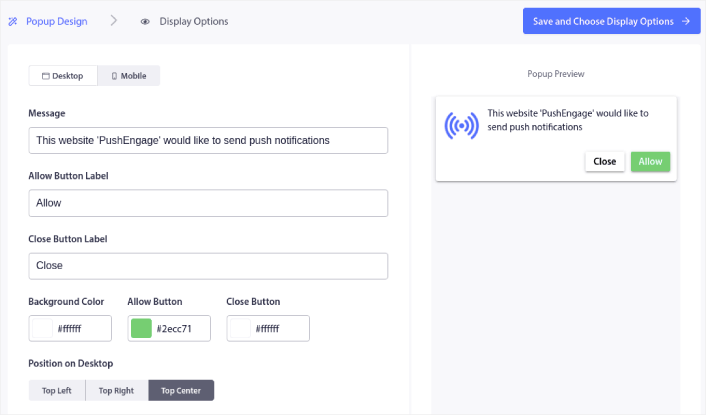
Here, you can customize everything about your popup modal. Write your own popup message and customize the button labels. Then, use your brand colors for the Background Color and the button colors.
You can even check the preview to see how the popup looks in different positions. You get three positions to choose from:
- Top left
- Top right
- Top center
Check out the live website to see what looks best and select your placement.
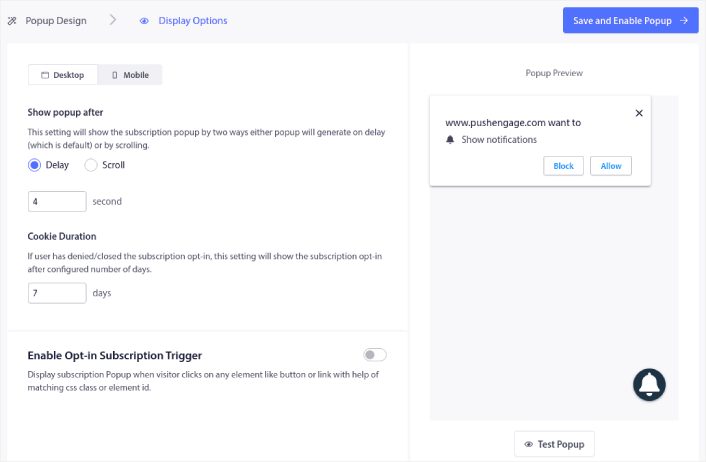
Scroll down to Enable Opt-in Subscription Rules and you can configure when you want your push notification optin to show up.

You can also create a Subscription Overlay with a Legal Consent Notice:
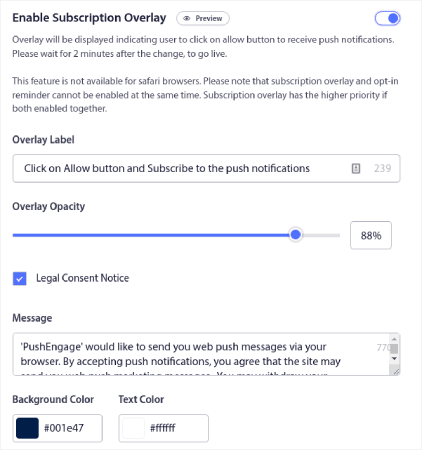
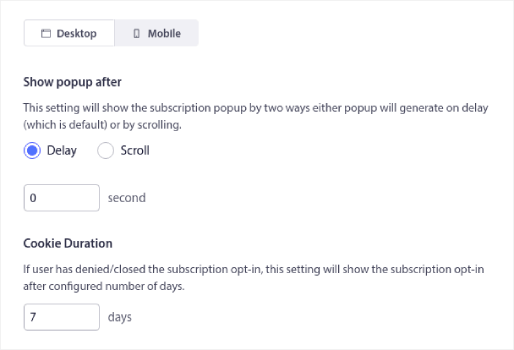
When you’re done, click the Save and Choose Display Options button. There, you can set up when the optin shows up by creating a delay after a visitor lands on a targeted page.
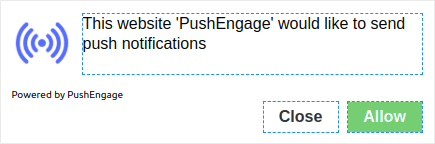
When you’re done just hit the Save and Enable Popup. This is what it should look like when you’re done:
How to Customize a Large Safari Style Box Opt-in
A Large Safari Style box appears in the center of the page both for mobile and desktop. And it’s a two-step optin. so, you can customize a lot about this sort of optin as well.
Customizing the Style
Before we get into what you can customize about your Large Safari Style Optin, let’s take a look at what you can’t customize. You only get a single placement option for this type of optin because of its size.
But as with a regular Safari-style optin, you can customize:
- Background Color
- Allow Button Color
- Block Button Color
And you can customize the text and font options using the live editor as well. The rest of the customization options are exactly the same as the regular Safari optin including the optin display settings and the intermediate page.
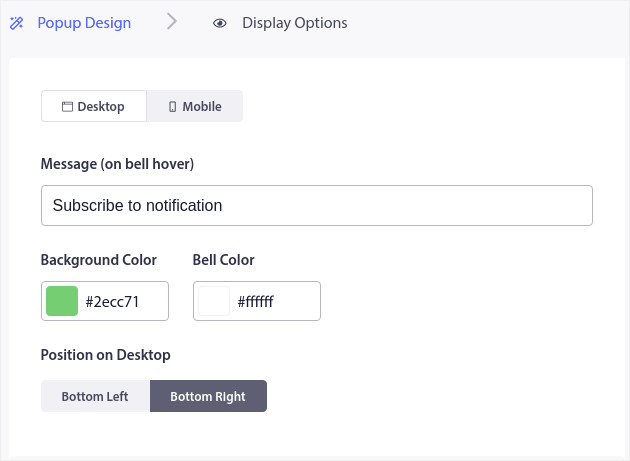
How to Customize a Bell Placed Bar
A bell placed bar appears at the bottom right or left of the page both for mobile and desktop. It’s a customizable, two-step optin with the same customization options as a Large Safari-style optin box. And it’s exactly what it sounds like. It’s a bar with a notification bell on it where your web visitors would have to click to subscribe.
Customizing a Bell Placed Bar Opt-in
As we said, you can only place this optin at the bottom right:
Or bottom left of the page both for mobile and desktop.
In that sense, it’s only slightly different from a Large Safari-style box. In terms of styles, you can change the colors for the bell and the background for the bell placed bar:
The rest of the settings are exactly the same as the Safari-style options.
How to Customize a Large Safari Style With Segments
A Large Safari Style Box with Segments is exactly what it sounds like. It’s a Large Safari optin with options to segment your subscribers automatically.
Creating segments for your push notification subscribers can help you personalize your campaigns a lot. If you have a website or blog with diverse content and you know your highest traffic sources already, you should try using a Large Safari Style Box with segments.
This type of optin is user-driven because the user decides what kind of notifications they would like to receive.
After creating the segments go to Design » Popup Modals and create a new Large Safari Style with Segment optin:
Click on Edit Popup and under the Popup Design tab, design your optin:
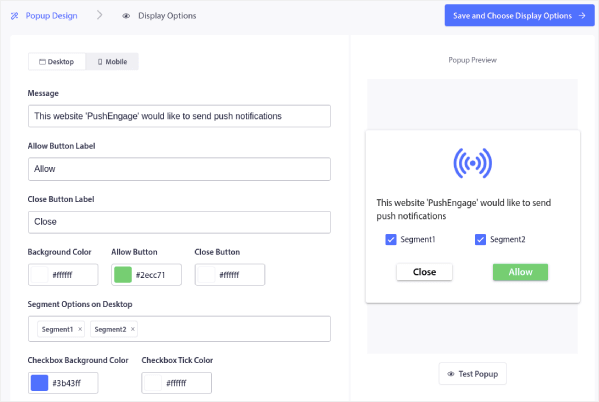
You can customize pretty much everything about your optin here starting from the copy to having your brand colors on the optin. In the Segment Options on Desktop field, you can select the segments you want your visitors to subscribe to.
The beauty of this optin is that the same subscriber can choose to subscribe to multiple segments right from the popup.
Scroll down to Enable Opt-in Subscription Rules and you can configure when you want your push notification optin to show up.
You can also create a Subscription Overlay with a Legal Consent Notice:
When you’re done, click the Save and Choose Display Options button. There, you can set up when the optin shows up by creating a delay after a visitor lands on a targeted page.
When you’re done just hit the Save and Enable Popup:

How to Customize a Floating Bar Push Notifications Optin
A floating bar optin appears at the bottom or at the top of the page both for mobile and desktop. Again, it’s a two-step optin with an intermediate page. So, you can customize a lot of it.
How to Style a Floating Bar
A floating bar optin is pretty similar to a bell placed bar optin. So, the styling options are also fairly similar. The major difference is that you get optin copy and buttons like any other two-step optin.
You can place them at the bottom of your screen:
Or at the top of your screen:
And then, you can customize the rest of the optin in the same way as any other optin. This includes background colors, button colors, any text in the entire optin, the intermediate page, and display options.
How to Customize a Single Step Push Notification Optin
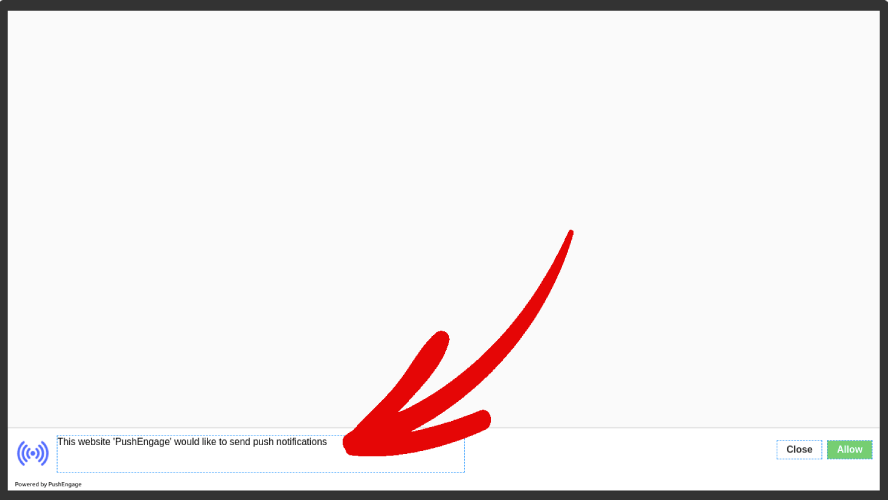
Simple answer: You can’t.
A single-step push notification optin can’t be customized because it uses system defaults to create a popup. What you can customize is the bell icon that comes along with your optin.
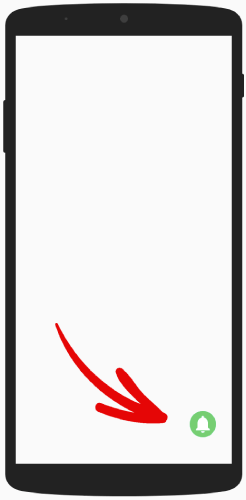
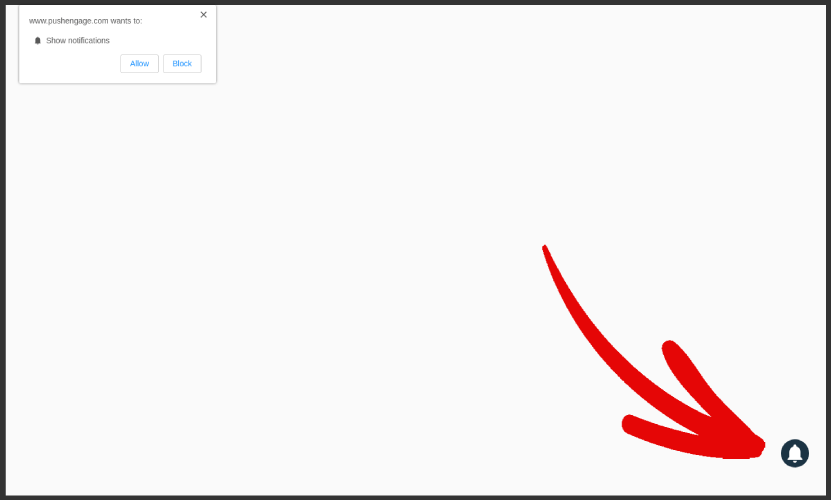
You can place the bell for the single-step notification on the bottom right:
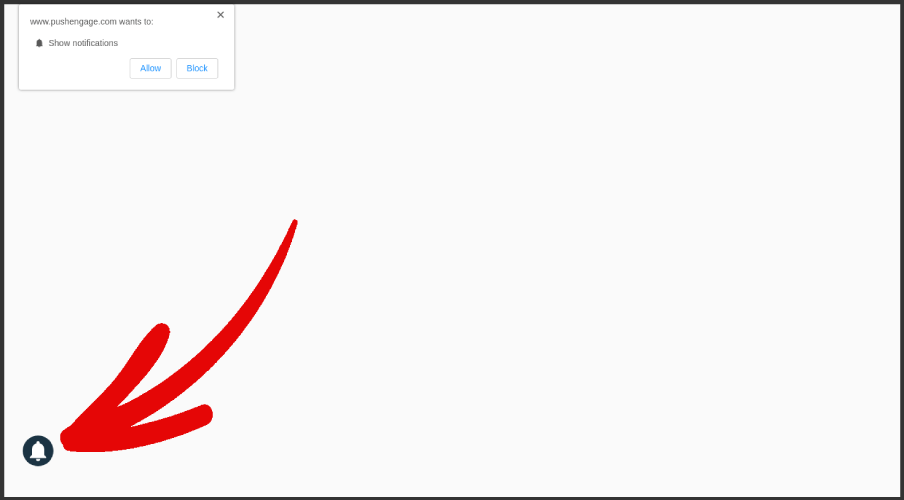
Or at the bottom left:
You can also change the bell colors and the hover text for the bell icon:
Scroll down to Enable Opt-in Subscription Rules and you can configure when you want your push notification optin to show up.
You can also create a Subscription Overlay with a Legal Consent Notice:
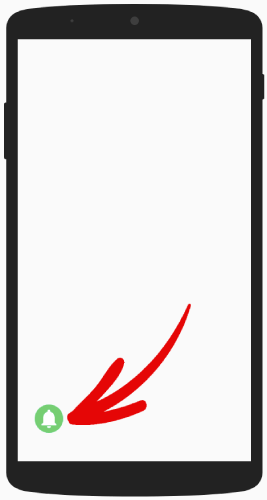
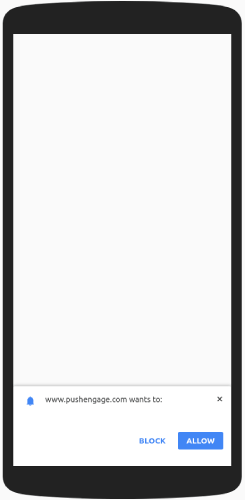
Keep in mind, that this is all for the desktop version only. The mobile version only has system defaults and you can’t change the placement either.
The mobile version of your single-step push notification options would look like this:
In terms of optin settings, you can set a delay for the optin to show up. And you can change the cookie duration to remember if someone declined to opt for your push notifications.
And that’s really all you can do with single-step options. We recommend that you get started with single-step options at first to boost your subscription rates.
If you’re just getting started with push notifications, building a list will be a higher priority for your business. Over time, you can switch to two-step options that are more customizable.
What to Do Once You’re Done Styling Your Popup Modals
Once you’re done customizing one push notification popup modal, go ahead and create more. You can create as many popup modals as you like using PushEngage.
Customizing the push notification optins on your site can help you convert your traffic into push subscribers and genuine business leads on autopilot.
Not convinced? Check out these resources:
- 7 Smart Strategies to Boost Customer Engagement
- 8 Trigger Push Notification Campaigns To Increase Your eCommerce Conversions
- How to Convert Subscribers To Buyers – Using Web Push Notification
We recommend using PushEngage to create your push notification campaigns. PushEngage is the #1 push notification software in the world. So, if you haven’t already, get started with PushEngage today!


