Looking for a guide on how to drive traffic to your eCommerce store?
Managing your inventory, handling sales and shipping, and doing your taxes is a LOT of work as is. But then, you also have to focus on marketing and think of traffic, engagement and sales.
So, how do get more traffic?
In this article, we’re going to show you how to drive traffic to your eCommerce store. And none of the tactics in this article need any experience with content marketing or related software at all.
Sounds good? Let’s dive in.
How to Drive Traffic to Your eCommerce Store
We’re going to talk about multiple ways to drive traffic to your eCommerce site. If you’re completely new to marketing, we recommend starting out with push notifications and then expanding to other marketing channels.
Check out this article on how to add push notifications to a WordPress site. Or, you can get started with our tips on how to drive traffic to your eCommerce site.
#1. Send Welcome Push Notifications
Whether you have a new store or an established one, website welcome messages are absolutely essential. Welcome push notifications are great for:
- Confirmation: You want to confirm that your new subscriber is indeed subscribed to your web push notifications.
- Re-engagement: Welcome campaigns are a great way to get your subscribers to come back to your site.
- Sales: You can give your new subscribers a welcome offer with discounts, freebies, and coupons.
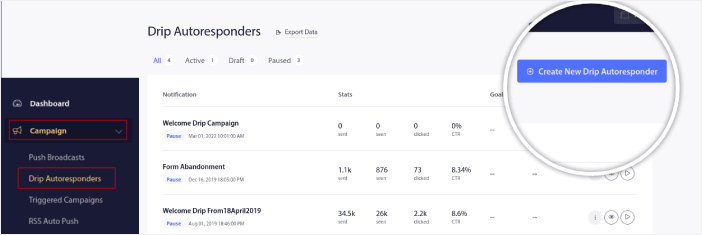
Let’s create a welcome push notification campaign now. Head over to your PushEngage dashboard and go to Campaign » Drip Autoresponders » Create New Drip Autoresponder:
Give your drip campaign a name that you can easily remember. Then, set the first push notification to go out immediately after a visitor subscribes to your push notifications.

You can edit the notification to create custom content for your welcome message. When you’re done, click the Add New Notification button to add more notifications to the sequence. You can edit the new notifications and set a custom delay between each notification.
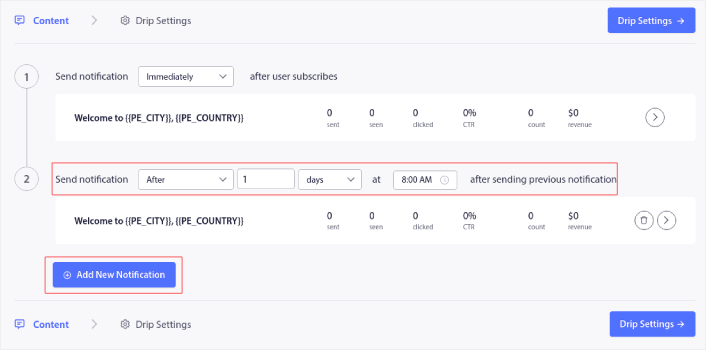
You can add as many notifications as you like, but we recommend creating a welcome drip with 5-7 notifications.
After that, select your audience in Drip Settings:
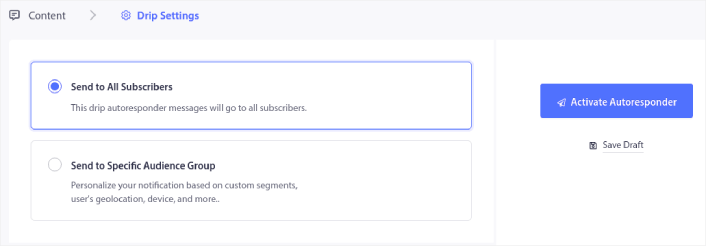
You can send different welcome drips for different segments by using the Send to Specific Audience Group option. This is especially useful when you’re segmenting visitors when they opt for push notifications. When you’re happy with your targeting, click on the Activate Autoresponder button. And you’re done!
#2. Create Cart Abandonment Push Notifications
Shopping cart abandonment is when a potential customer adds a product to the shopping cart and doesn’t complete the checkout process. In other words, they abandon your products for some reason and simply move on.
Online shopping cart abandonment can be due to a significant problem in the user interface or a lack of trust, or even some hidden charges. If you’re running a new store, then you should check out our article on how to reduce shopping cart abandonment.
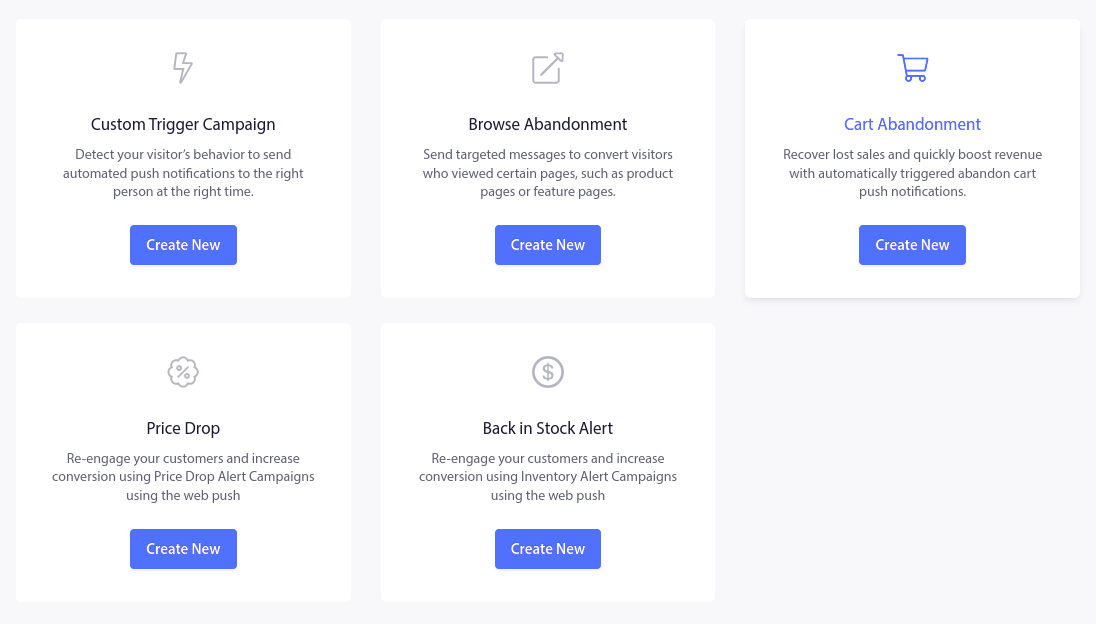
Now, it’s time to create your cart abandonment campaign. Head over to Campaigns » Triggered Campaigns and click on Create New Triggered Campaign:

Then, from the campaign templates, select Cart Abandonment and click on Create New:
If you need a detailed tutorial on creating a cart abandonment campaign, check out this article on how to set up cart abandonment push notifications.
#3. Set Up Browse Abandonment Push Notifications
A browse abandonment notification is an automated push notification that gets sent when someone browsing your website decides to bounce without taking any action. Sending the visitor a reminder that they were interested in something on your website can hugely increase your conversion rates.
A browse abandonment notification ends when your visitor adds something to their cart. After that, a cart abandonment notification takes over to convert them into paying customers.
That’s where browse abandonment campaigns come into play. Using the browse abandonment email examples in this article, you can target, convince, and convert:
- Customers who added a product to a Wishlist, but not their Cart
- Customers who viewed a product more than once
- Customers who browsed more than 3 products in the same category
- Customers who searched the site for a specific product
- Customers who stayed on a product page for at least 3 minutes and didn’t buy
Head over to your PushEngage dashboard and go to Campaign » Triggered Campaigns. Then click on Create New Browse Autoresponder:
And then, select the Browse Abandonment Campaign type from the list of campaign types and click on Create New:

By now, you should be able to see a campaign setup dashboard. Create your campaign under Content:
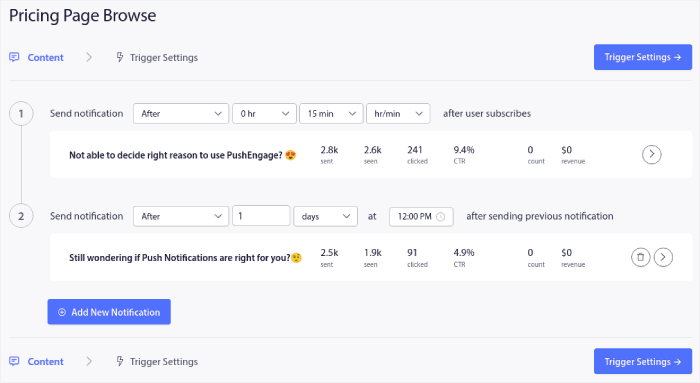
Most of this is straightforward. Give your campaign a name and create a sequence of browse abandonment push notifications. When you’re done, click on Trigger Settings.
It’s time to set up the trigger for browse abandonment:
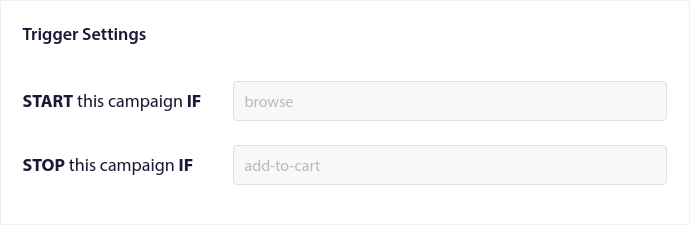
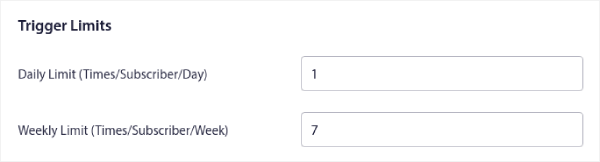
These are default values for the browse abandonment campaign template. So, you don’t have to change anything here. You can set Trigger Limits based on how often you want to send push notifications:
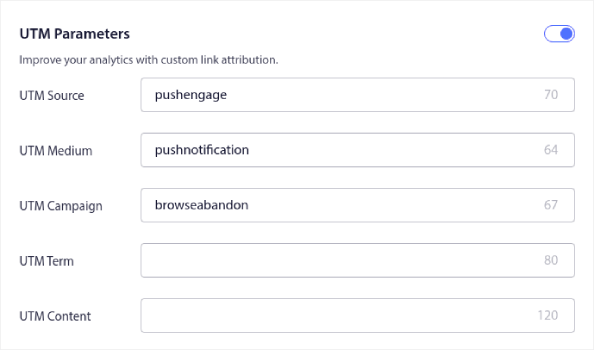
And you can also set up UTM parameters here:
And enable Goal Tracking as well:
If you’re new to push notification analytics, check out our guide to goal tracking for push notifications.
#4. Send Cross-Selling Push Notifications
Cross-selling is selling related or complementary products to a customer. It’s one of the most effective methods of marketing. You can easily increase your Average Order Value (AOV) using cross-selling campaigns.
According to Amazon, 35% of its sales come from cross-selling. Cross-selling push notifications are campaigns that automatically cross-sell products to your customers. Cross-selling push notifications help you increase sales as you’re 60-70% more likely to sell to an existing customer.
It’s also super easy to set up a cross-selling campaign for your eCommerce site using push notifications.
- Create segments based on product categories and add a customer to the relevant segment when they make a purchase
- Identify products to cross-promote under each segment
- Create a drip notification for each segment and send the relevant product or product list to cross-promote
It’s as simple as that.
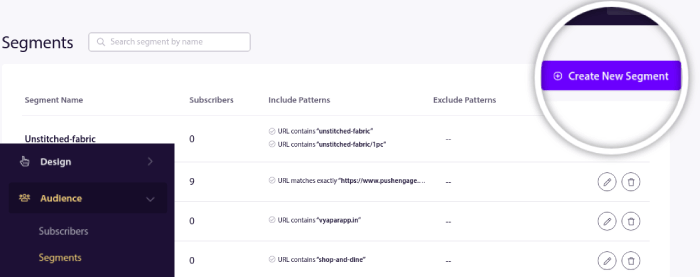
Head back to your PushEngage dashboard and go to Audience » Segments and create your segments:
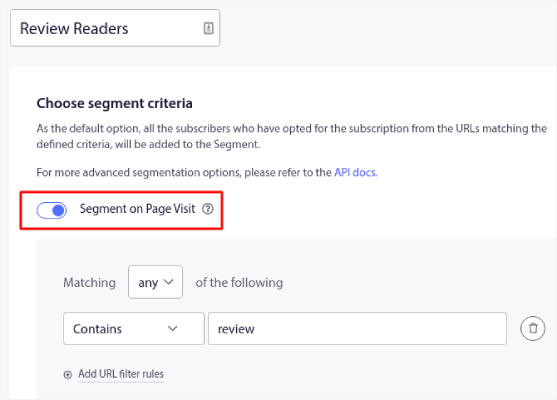
You’ll want to segment your visitors when they visit a product in a specific category:
Then, find a product to cross-sell for each segment and create a drip autoresponder to promote it.
#5. Create Recurring Sales for Your Store
You can schedule push notifications to keep repeating every week. Or every few days. Loads of PushEngage customers use repeat scheduling and they absolutely love this feature. It’s made an especially significant difference for eCommerce sites.
Why would you use repeat scheduling?
Imagine that you have a weekly sale for a flea market. Or a weekend sale. Or a stock clearance sale. Or even a monthly flash sale. These are live events that keep repeating like clockwork.
Do you honestly want to create a different push notification every week? Especially if you know ahead of time that these sales are going to be a major part of your marketing strategy? Or, would you rather just create the notification once and schedule it to fire off every week at a fixed time?
That’s exactly what recurring push notifications can do for you. Head over to the PushEngage dashboard and create a broadcast under Broadcast Push:

Then, create a new push notification to send. Customize the content under the Content tab:
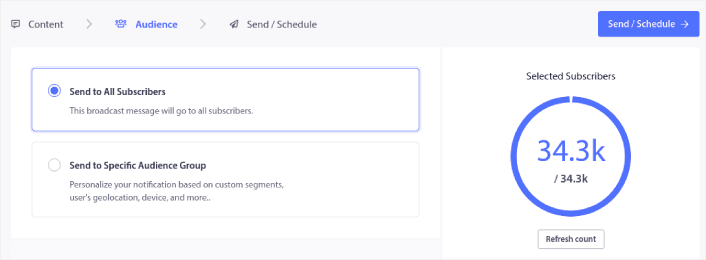
Next, select your audience under Audience:
And finally, under Send/Schedule, you can schedule the notification as a recurring push notification:
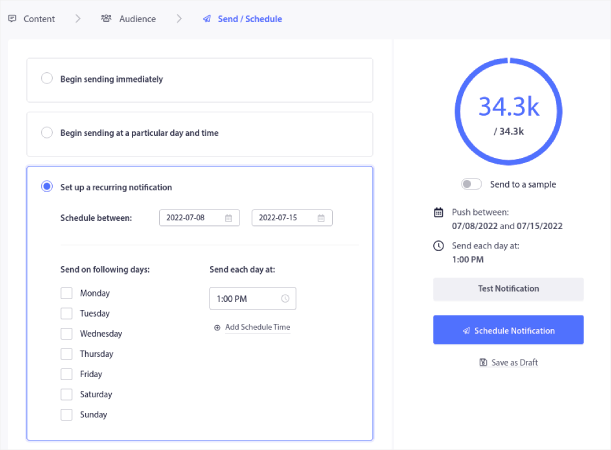
You can easily create any schedule you like for your push notifications including custom days, dates, and times.
#6. Create a Price Drop Alert
Head over to your PushEngage dashboard and go to Campaigns » Triggered Campaigns:
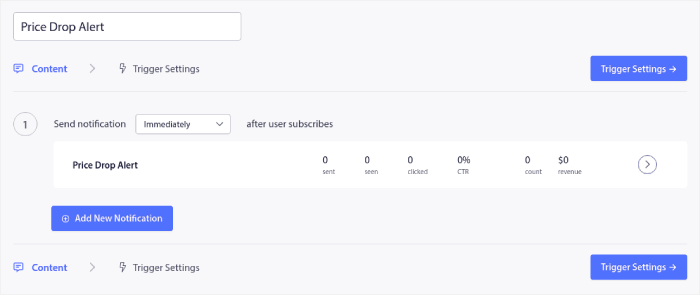
Select the Price Drop campaign type and click on Create New. And you should see a new screen to create your campaign that looks like this:
Fill out the Content section. This is where you’d create your entire campaign. If you like, you can also create a series of push notifications or a single one.
When you click on any of the push notifications in the sequence, you get to customize the notification to any degree you want:
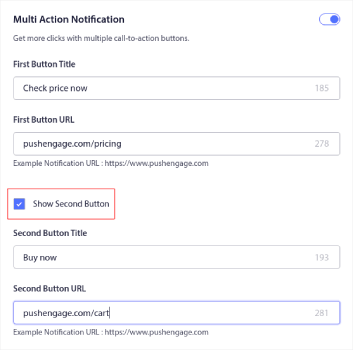
You can also add multiple buttons for a smoother conversion:
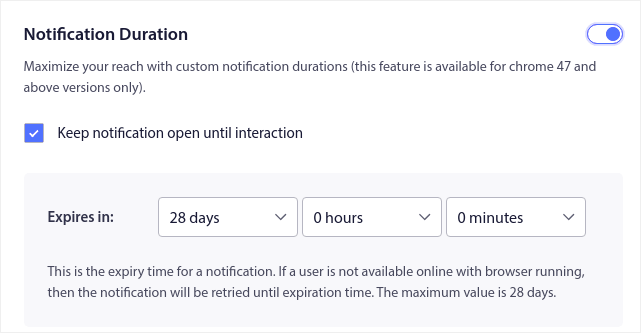
And you can set a custom notification duration under Notification Duration:
When you’re done with the Content tab, click on the Trigger Settings button and configure when your push notifications get sent.
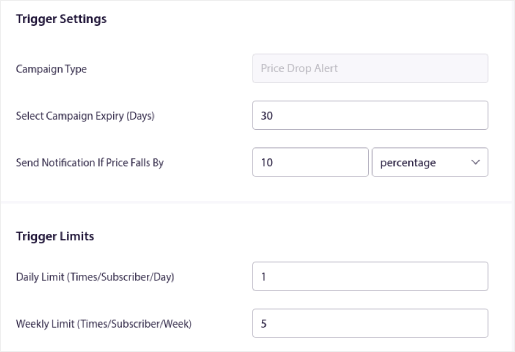
- The Campaign Type is a Price Drop Alert.
- The Select Campaign Expiry puts a hard expiry date on your push notification because a price drop is usually time-limited.
- The Send Notification If Price Falls By field is what triggers your campaign. You can create a percentage drop or an absolute drop in price to trigger the campaign.
- The Trigger Limits can put a cap on the maximum number of notifications you send to your subscribers.
For more detailed instructions, check out our article on how to create a price drop alert.
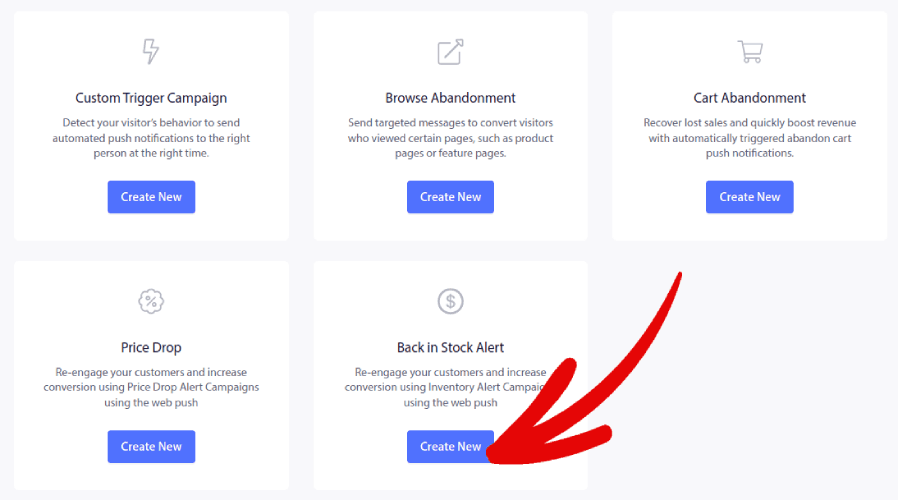
#7. Create a Back in Stock Alert
Head over to your PushEngage dashboard and go to Campaign » Triggered Campaigns and click on Create New Triggered Campaign:

Then, select the template for Back In Stock Alerts and click on Create New:
And you should see a new screen to create your campaign that looks like this:
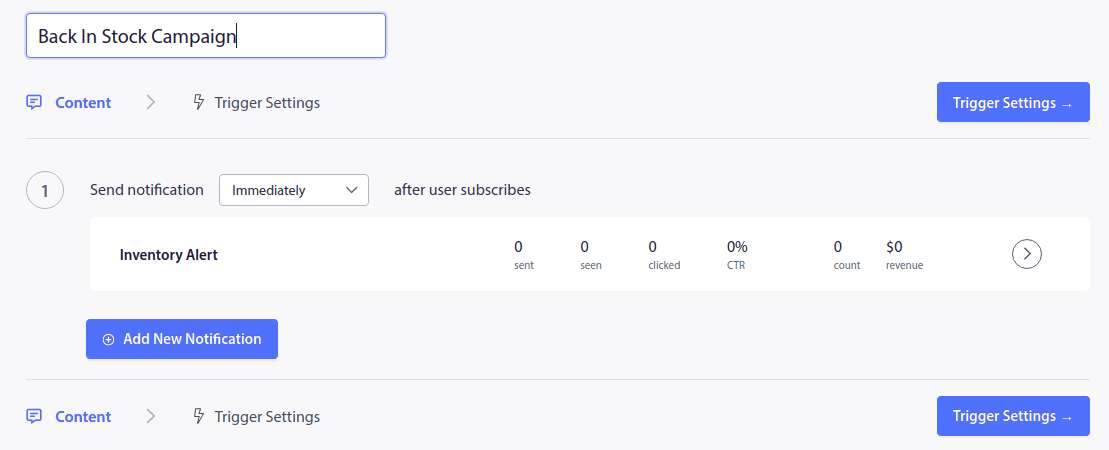
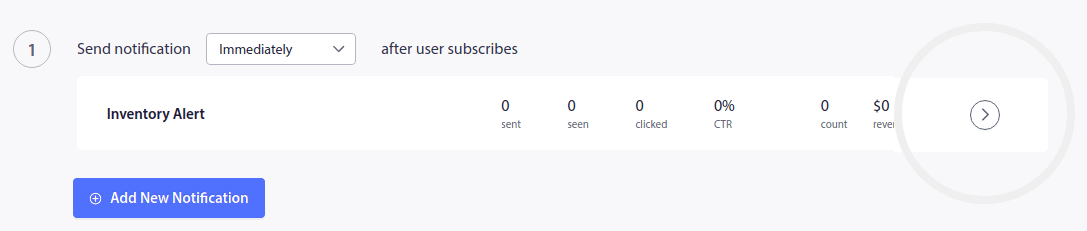
Next, to create your first notification, click on the arrow mark next to the notification:
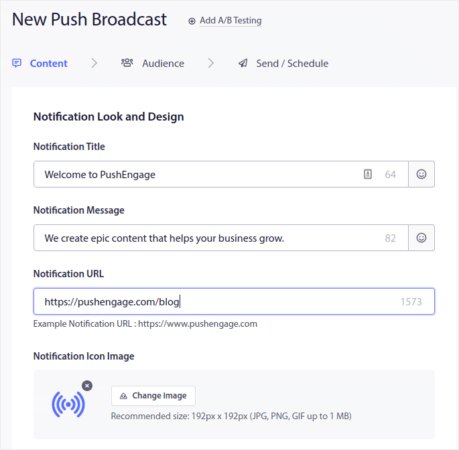
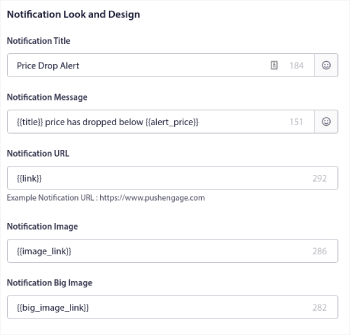
Then, edit your push notification copy under Notification Look and Design:
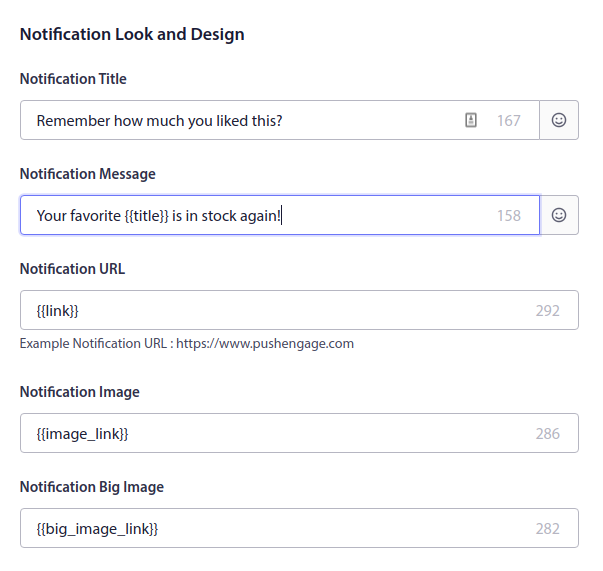
As you can see, there are a bunch of custom tags such as {{title}} and {{link}} in the push notifications. These tags are called attributes. We talk about PushEngage attributes in more detail in our article on how to send personalized push notifications with attributes.
#8. Create a Blog Subscription Widget
You want to make it as simple as possible for your readers to subscribe to your blog. By having people subscribe to your blog, you can get repeat traffic, engagement, and sales. And the best way to do it is to use a widget to get more subscribers.
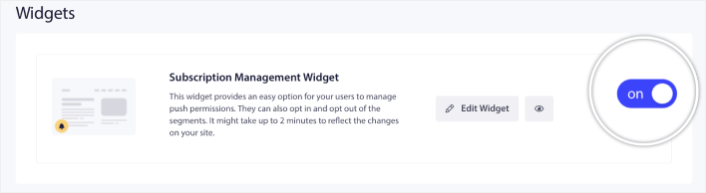
Head over to the PushEngage dashboard and go to Design » Widgets and enable the Subscription Management Widget:
Click the Edit Widget button to customize your widget. Start by customising the look and feel of your widget to match your brand’s design language under Look and Design:
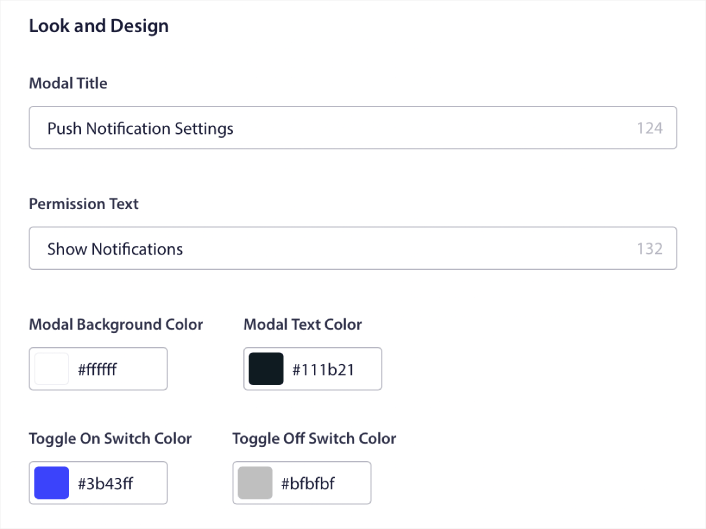
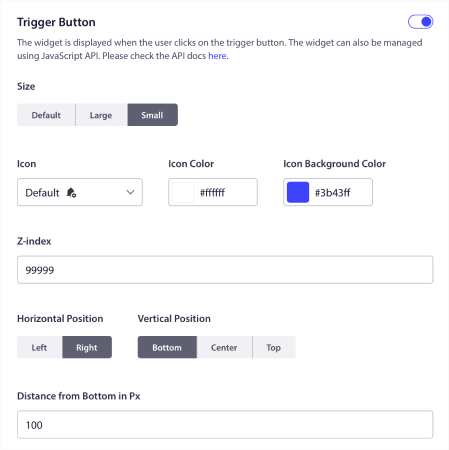
You can create a completely custom popup modal that sticks around even when your visitors don’t subscribe from your default popup modal. If the sizing of the popup trigger button feels off to you, you can customise that as well under Trigger Button:
If you need a more detailed guide, you should check out our article on how to add a blog subscription widget in WordPress.
#9. Set Up RSS Auto Push
Constantly creating content and managing a blog is hard work. But if you’re running a serious business, you know that just creating content isn’t good enough. You have to be able to promote your content as well.
And push notifications are a great way to gain subscribers in a cost-effective way. What makes push notifications so good as a marketing tool is that they can be completely automated. That’s where RSS push notifications come into the picture.
Head over to your PushEngage dashboard and go to Campaign » RSS Auto Push:
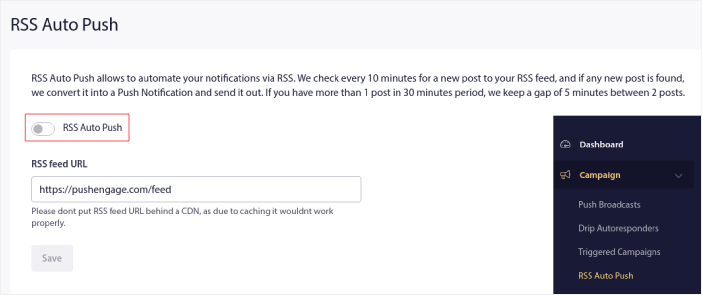
Click the toggle button to enable RSS Auto Push and paste in your RSS feed URL. Once that’s done, click on Verify RSS to confirm that your RSS feed has been accepted. When you’re done, simply hit Save.
Now, every time you publish a new post, your push notification subscribers will automatically receive a push notification about your new content.
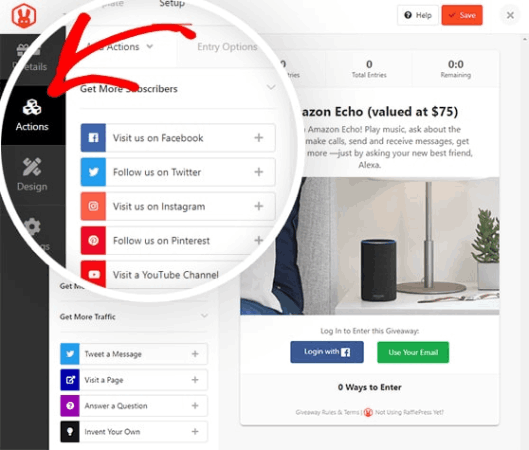
#10. Run Viral Giveaways
Giveaways are great for increasing your site’s traffic, engagement, and sales. But creating one from scratch can be a real pain. You either have to take care of the entire contest manually or you have to custom develop a software to manage the giveaway for you.
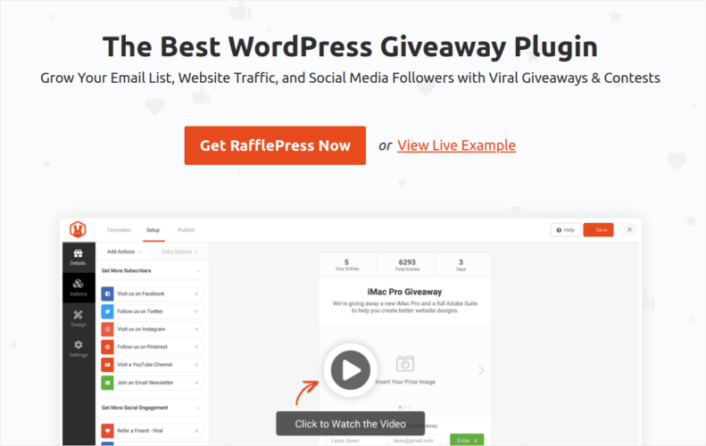
We recommend creating giveaways using a top-tier WordPress giveaway plugin such as RafflePress.
RafflePress is the most powerful WordPress giveaway plugin. You get a visual builder with the plugin to create and run viral contests. It’s also the only beginner-friendly WordPress giveaway plugin. In our opinion, the paid version of the plugin is worth every penny. But you can also get started for free.
RafflePress is the most powerful WordPress giveaway plugin. You get a visual builder with the plugin to create and run viral contests. It’s also the only beginner-friendly WordPress giveaway plugin. In our opinion, the paid version of the plugin is worth every penny. But you can also get started for free.
The best part is that you get powerful pre-built templates that are designed to:
- Grow your email list
- Refer friends with word-of-mouth marketing
- Run a giveaway before your site launches
- Grow your Facebook page
- Grow your Twitter followers
- Grow your YouTube channel
- Grow your Instagram following
And you can do all of it with zero coding. You can simply get started using a drag-and-drop giveaway builder:
Take a look at our review of RafflePress, where we explored the features of the plugin in greater depth. Or, you can get started right now and check out our article on how to create a YouTube giveaway.
#11. Optimize for the Right Keywords
SEO can be challenging for any small business. A good starting point is to use a keyword research tool to find keywords with low competition and high search volume. We recommend using Ahrefs for your research. You want to find keywords that have high commercial intent for your product pages and create content focused on transactional keywords with low competition.
Transactional keywords are keywords that help consumers make a purchase decision. Having low competition just allows you to rank faster for your content and get more sales quickly.
It’s the same with affiliate marketing sites as well. Let’s say you want to get into promoting skincare products.
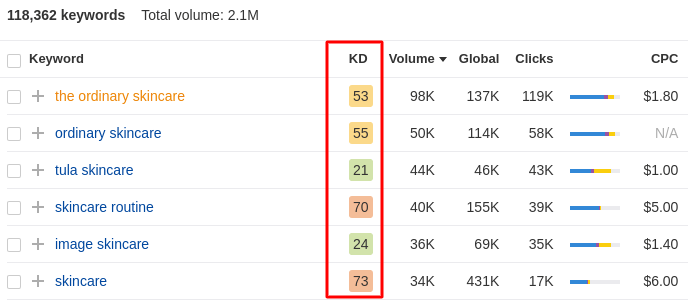
The keywords with the highest volume are really difficult to rank for. Instead, take a look at the keywords for beauty serum products:
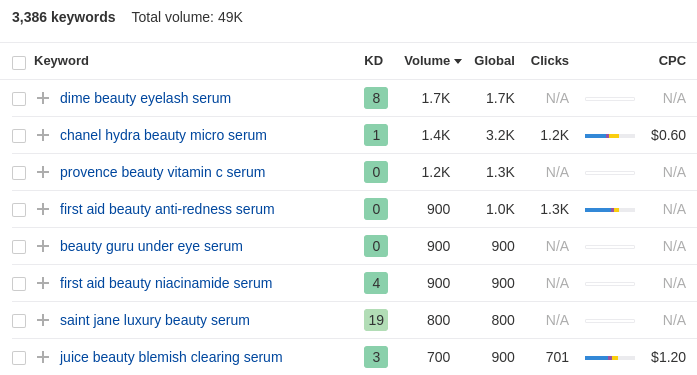
The keyword difficulty is considerably lower. And you have 3000+ keywords that are all fairly low-competition and focused on a product-driven niche. A really cool thing is that there are many keywords with fairly high search volume and they have very little competition.
Next, you want your readers to make a purchase decision on your site. So, what kind of content helps your readers make that decision?
It could be a product review. Or a comparison between similar products. It could even be a matter of what kind of spending budget your audience will have for the products you promote.
For our example of beauty serum products, it’s really obvious. Let’s take the keyword ‘Provence beauty Vitamin C serum’ as an example. The keyword gets decent search traffic, is product-focused, and has virtually no competition.
What’s ranking on Google for that keyword right now?
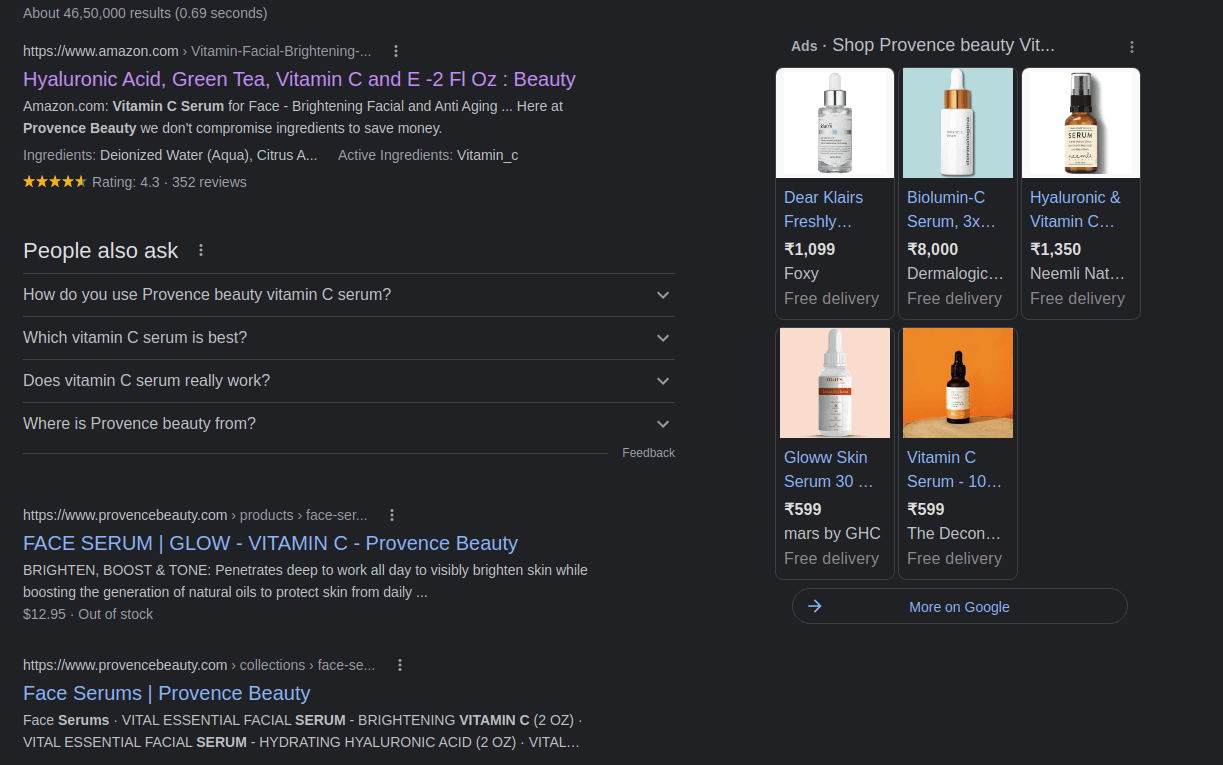
These are all direct purchase links. And the content is all about features, ingredients, and instructions.
Can you give your readers a reason to buy that product beyond the usual beauty product promises? Maybe you can talk about the vegan aspect of the product.
This helps you stand out from the crowd and give your readers a convincing reason to buy the product.
#12. Start an Email Marketing Campaign
Email marketing is still one of the best ways to grow your business. It’s both affordable and effective. And you can create automated campaigns that sell even the most “boring” product like hot cakes.
Every campaign you just saw using push notifications can be created using emails as well. First, go ahead and choose an email marketing service.
We recommend using Constant Contact to send email marketing campaigns.

Constant Contact is the best email marketing service to set up autoresponders for your business. It’s super easy to use and offers tons of automation features to improve your email campaigns.
- Easy drag and drop builder to create emails
- Hundreds of pre-designed email templates
- Welcome messages, birthday offers and abandoned cart autoresponders
- List building tools and signup forms to grow your audience
- Split testing for targeted emails
- Integrations with CRMs and third-party services
- Excellent support via live chat and phone
Not to mention, Constant Contact has a forms plugin for WordPress that you can use to collect leads and nurture with autoresponders. A couple of things you should consider here are:
- Ease of use: Is the solution beginner-friendly, or does it require some previous knowledge and expertise?
- Welcome Sequence: Can you create an automated sequence of welcome messages using the plugin?
- Web Triggers: Can you trigger autoresponders from events such as form submission, popup click-throughs, or abandoned carts?
- List Segmentation: Can you segment your customers into smaller lists for more targeted marketing?
- Alerts: Can you schedule messages to notify the subscribers of new products, price drops, and back-in-stock alerts?
- Personalization: Can you personalize the message using advanced settings and attributes?
- Special Offers: Can you automatically send special offers such as birthday gifts and anniversary presents?
- A/B Testing: Can you split test different versions of your messages to boost conversions?
- Follow-ups: Can you create custom workflows based on how they interact with previous emails?
- Analytics: Do you get a built-in analytics dashboard to track the performance of your campaigns?
Pro Tip: If your WordPress email autoresponders are ending up in spam folders, you should also check out how to configure WordPress SMTP.
#13. Create an Affiliate Program
Onboarding affiliates can be a really great way to increase your revenue without having to spend a ton on advertisements. But affiliate marketing has its own challenges.
Starting an affiliate program from scratch can be really complicated and expensive. You get the same problem if you’re running affiliate offers on your own content. It’s a lot of work trying to set everything up manually.
That’s where affiliate marketing plugins come into play. But which plugin should you use?
If you’re a vendor looking to create an affiliate program, you need to think:
- How do you know which plugin is easy to set up?
- Or if they’re worth the price?
- Which ones are going to blend into your website and which ones will break your site due to theme compatibility issues?
We recommend using AffiliateWP to manage your affiliates.
AffiliateWP is a WordPress plugin that allows you to create an affiliate program for your products and services. It’s easy to use, highly reliable, and requires zero coding to set up.
The best part? AffiliateWP allows you to grow your affiliate network using completely automated tools. Here’s a quick look at what AffiliateWP can do for your business:
- Affiliate Tracking and Management
- Real-Time Reporting
- User-friendly Affiliate Onboarding
- Automated Affiliate Payments
- Customizable Email Notifications
- Integrations with Popular Plugins and Services
- One-Click Affiliate Data Import/Export
- Free and Paid Addons
For a closer look at the features, you should check out our full review of AffiliateWP.
#14. Use Power Words in Headlines to Boost CTR
If you’re ranking in the top 10 results on search engines but aren’t getting traffic, that’s because no one’s clicking on your link.
You can add power words to make your titles more attractive and trigger an emotional response. For example, here’s a headline that uses power words and gets visitors to click on the link.
Use the MonsterInsights Headline Analyzer tool to optimize your headlines for more clicks. Simply sign up for a MonsterInsights Plus plan or higher to use the Headline Analyzer Tool inside your WordPress editor to get instant feedback.

Check out our review of MonsterInsights for a closer look at its features.
#15. Run Polls and Surveys on Your eCommerce Store
With a well-designed survey, you can easily collect useful information, feedback, and opinions from your site visitors. You can then use the collected information to make informed decisions for improving your business strategies. They can also be used to increase the engagement on your site very organically while generating leads.
We recommend checking out WPForms to create forms, polls, and surveys on your WordPress websites.

WPForms is the best WordPress form builder plugin. We’ve tested out a bunch of form plugins for WordPress and none of them come even close to the functionality or the ease of use of WPForms.
You can use a drag-and-drop form builder in WPForms to create and publish:
- Surveys and Polls
- Multi-step Forms
- Conditional Logic Forms
- Form Abandonment Campaigns
- Form Landing Pages
- Form Templates
- Offline Forms
- Conversational Forms
You can even track user journeys for your forms to understand different customer touchpoints and optimize them over time. Go ahead and create a WordPress form with WPForms and you’ll understand right away why we love the plugin so much.
#16. Create a Coupon Marketing Strategy
Studies have shown that:
- Customers spend 25% more money with a coupon than without one
- 48% of customers buy sooner when they have a coupon
- 37% of customers buy more than they normally would
But how well are you actually using your coupons to increase your business? Promoting coupons can be really difficult with traditional methods such as listing them on coupon directories and articles. You need to take a more proactive approach to get more bang for your buck.
If you’re new to coupon marketing altogether, then you should check out our article on coupon marketing strategies.
What to do After You Know How to Drive Traffic to Your eCommerce Site
Now that you know how to drive traffic to your eCommerce site, you should start setting up the marketing campaigns immediately. The worst thing for you to do is sit on the idea and wait for your traffic to grow all on its own.
As you’ve already seen, push notifications are a great tool for growing traffic, engagement, and sales.
Not convinced? Check out these amazing resources on push notification campaigns:
- How to Convert Subscribers To Buyers Using Web Push Notifications
- How to Notify Subscribers of New WordPress Posts
- How to Send Back-in-Stock Notifications to Get More Sales
We recommend using PushEngage to send your push notifications.
PushEngage is the #1 push notification software in the world. So, if you haven’t already, get started with PushEngage today!


